Strawberry Cheesecake Bars
Strawberry cheesecake bars hit that sweet spot between creamy dessert and neat, handheld slice. The crust stays buttery and firm enough to hold its shape, the filling bakes up smooth…
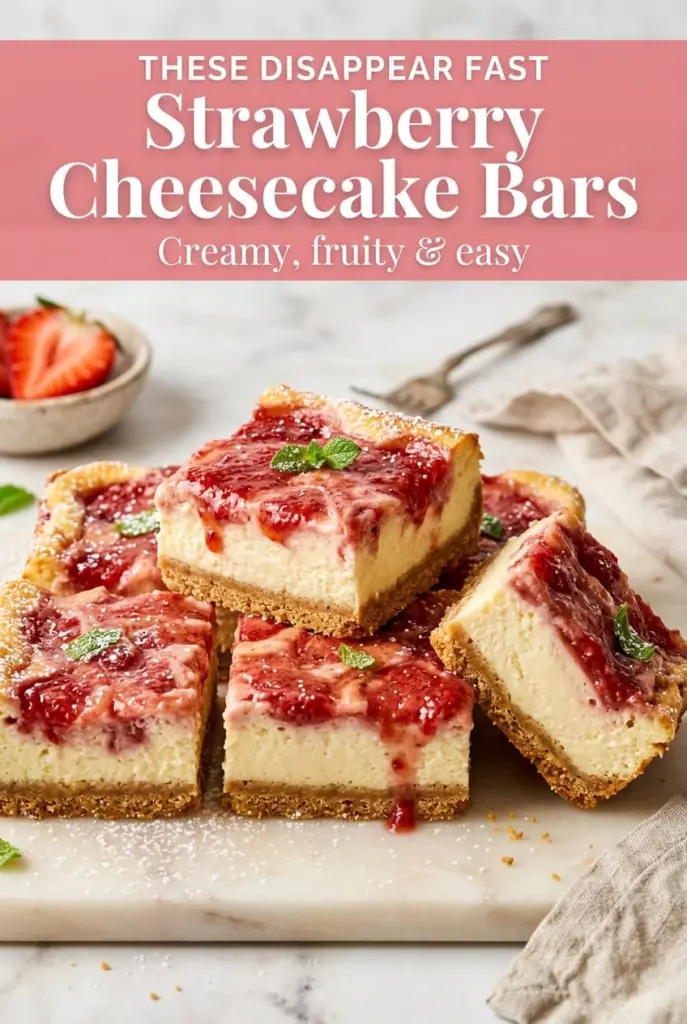
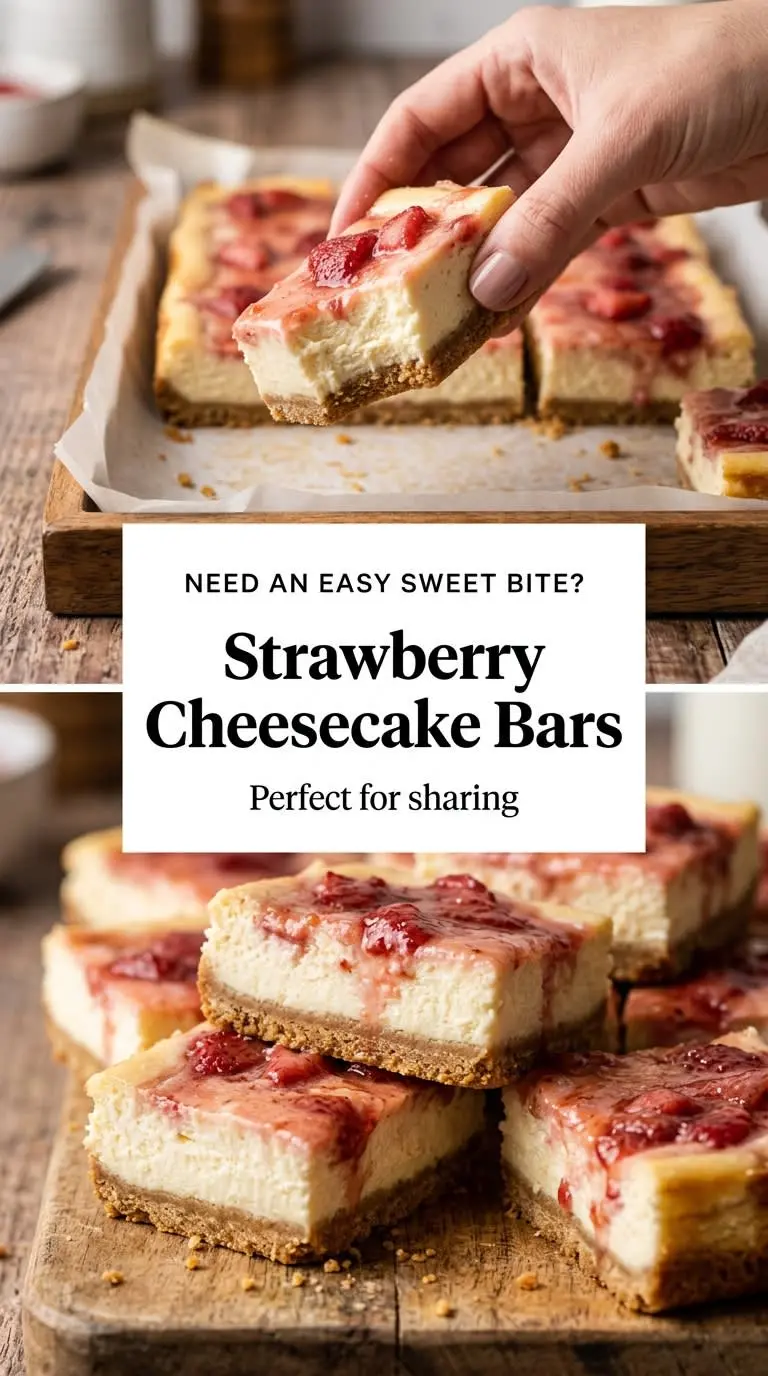
Tip: save now, cook later.Strawberry cheesecake bars hit that sweet spot between creamy dessert and neat, handheld slice. The crust stays buttery and firm enough to hold its shape, the filling bakes up smooth instead of dense, and the strawberry topping gives each bar a bright finish that keeps the whole pan from tasting heavy. When they’re chilled properly, the bars cut cleanly into tidy squares with distinct layers you can actually see on the plate.
What makes this version work is the balance in each layer. The graham cracker base gets a short bake so it sets before the filling goes in, which keeps it from turning sandy under the cheesecake. The filling uses softened cream cheese, gentle mixing, and a little heavy cream for a softer texture, while lemon juice keeps the flavor from going flat. The strawberry topping is cooked just enough for the cornstarch to thicken the juices, so it spreads like a glossy fruit layer instead of soaking into the cheesecake.
Below, I’ve included the one cooling step you shouldn’t rush, plus a few smart swaps if you need to work with what you have. The texture depends on a couple of small details, and once you know them, these bars are easy to repeat.
The crust held together perfectly and the strawberry layer set up thick instead of running everywhere. I chilled them overnight and they sliced into clean bars with no mess at all.
Love the creamy filling and fresh strawberry topping? Save these strawberry cheesecake bars to Pinterest for the next time you want a chilled dessert that slices cleanly.
The Thin Line Between Creamy Bars and a Cracked Cheesecake Top
The biggest mistake with cheesecake bars is treating them like a cake batter. Too much air in the filling gives you puffing, sinking, and those little surface cracks that show up once the bars cool. The goal here is a smooth, low-air filling that bakes until the edges are set and the center still has a slight wobble.
The other place people go wrong is overbaking. Cheesecake keeps cooking after it leaves the oven, so if the middle looks completely firm in the pan, it usually ends up dry once chilled. Pull it when the center still moves a little like set custard. The chill time finishes the job.
- Softened cream cheese blends into a smooth filling without lumps. Cold blocks leave little bits behind, and those don’t disappear in the oven.
- Heavy cream softens the texture just enough to keep the bars from feeling stiff. Whole milk works in a pinch, but the filling won’t have the same plush finish.
- Lemon juice sharpens the cheesecake so the strawberry topping tastes brighter. You don’t taste lemon; you taste balance.
What Each Ingredient Is Actually Doing in These Bars
- Graham crackers build the base flavor and texture. Crush them finely so the crust presses into an even layer instead of a crumbly patchwork.
- Unsalted butter is what lets the crust slice cleanly. If the crumbs still look dry after mixing, add a touch more butter rather than packing in extra crumbs.
- Cream cheese is the backbone of the filling, so use full-fat if you can. Lower-fat cream cheese makes a looser batter and a less luxurious set.
- Eggs set the filling as it bakes. Add them one at a time and mix just until combined; beating hard at this stage whips in air you don’t want.
- Strawberries should be ripe and fragrant. If yours are a little tart, the sugar in the topping will smooth that out, but underripe berries won’t give the same jammy finish.
- Cornstarch thickens the fruit layer so it sits on top instead of leaking into the cheesecake. Cook it long enough for the mixture to turn glossy and slightly translucent.
Building the Layers So They Slice Cleanly
Pressing and Prebaking the Crust
Mix the graham cracker crumbs, melted butter, and sugar until every crumb looks evenly coated, then press the mixture firmly into the pan. Use the bottom of a measuring cup to pack it tight, especially into the corners, because loose crust falls apart when you cut the bars. A brief bake sets the butter so the base holds its shape under the filling.
Mixing the Filling Without Whipping It Full of Air
Beat the cream cheese and sugar only until the mixture looks smooth and satiny. Add the eggs one at a time and stop mixing as soon as each one disappears. If you keep going, the batter traps air and rises too much in the oven, which makes the top more likely to split as it cools.
Baking Until the Center Still Moves
Pour the filling over the cooled crust and bake until the edges are set and the center has a slight jiggle. It should look puffed at the rim and just a little soft in the middle when you gently tap the pan. If the whole surface looks firm, it has gone too far and the chilled bars will taste dry.
Cooking the Strawberry Topping to a Glossy Finish
Cook the strawberries, sugar, water, and cornstarch together until the berries break down and the mixture thickens into a shiny sauce. The topping should look glossy and spoonable, not thin and watery. Let it cool before spreading it over the cheesecake, or the heat will loosen the top layer and blur the edges.
Three Ways to Make These Bars Fit the Pantry You Have
Gluten-Free Crust
Swap the graham crackers for gluten-free graham-style crumbs or crushed gluten-free digestive biscuits. The texture stays close to the original, though some gluten-free crumbs need a spoonful more butter to hold together in the pan.
Dairy-Free Version
Use dairy-free cream cheese and a plant-based butter substitute in the crust. The bars will still set, but the filling won’t be quite as rich, so chill them fully before cutting or the slices can slump.
Mixed Berry Topping
Replace part of the strawberries with raspberries or blueberries for a sharper fruit layer. Raspberries give a tarter finish, while blueberries make the topping a little sweeter and thicker. Keep the cornstarch the same either way.
Storage and Reheating
- Refrigerator: Store covered for up to 5 days. The crust softens a little over time, but the bars still hold their shape well.
- Freezer: These freeze well if you wrap individual bars tightly and freeze them without the topping if possible. Thaw in the fridge for the cleanest texture.
- Reheating: Don’t reheat these bars. Cheesecake is meant to be served cold here, and heat will loosen the filling and make the strawberry layer run.
Answers to the Questions Worth Asking

Strawberry Cheesecake Bars
Ingredients
Equipment
Method
- Preheat oven to 170°C (340°F) and line a baking pan with parchment. Keep the oven fully heated before baking.
- Mix crushed graham crackers, melted unsalted butter, and granulated sugar, then press firmly into the pan. Press until the layer is even and compact.
- Bake the crust for 8-10 minutes at 170°C (340°F), until set and lightly fragrant. It should look dry around the edges.
- Cool the crust completely at room temperature. This helps prevent the cheesecake layer from loosening it.
- Beat cream cheese and granulated sugar until smooth. Stop and scrape the sides so no lumps remain.
- Add eggs one at a time, mixing gently after each addition. Mix just until incorporated to avoid a grainy texture.
- Stir in heavy cream, vanilla extract, and lemon juice. The batter should look glossy and fluid.
- Pour the cheesecake mixture over the cooled crust and bake at 170°C (340°F) for 30-35 minutes until the edges are set and the center jiggles slightly. The center should be just set, not browned.
- Cool the pan to room temperature. The surface should become more firm as it cools.
- Chill in the refrigerator for 3 hours to fully set. Use a firm, cold base before adding topping.
- Cook strawberries, granulated sugar, water, and cornstarch over medium heat until thick and glossy. Stir continuously so it thickens evenly.
- Spread the strawberry topping over the chilled cheesecake and cut into bars. For neat slices, cut after the topping has cooled slightly.
