

Roasted Butternut Squash
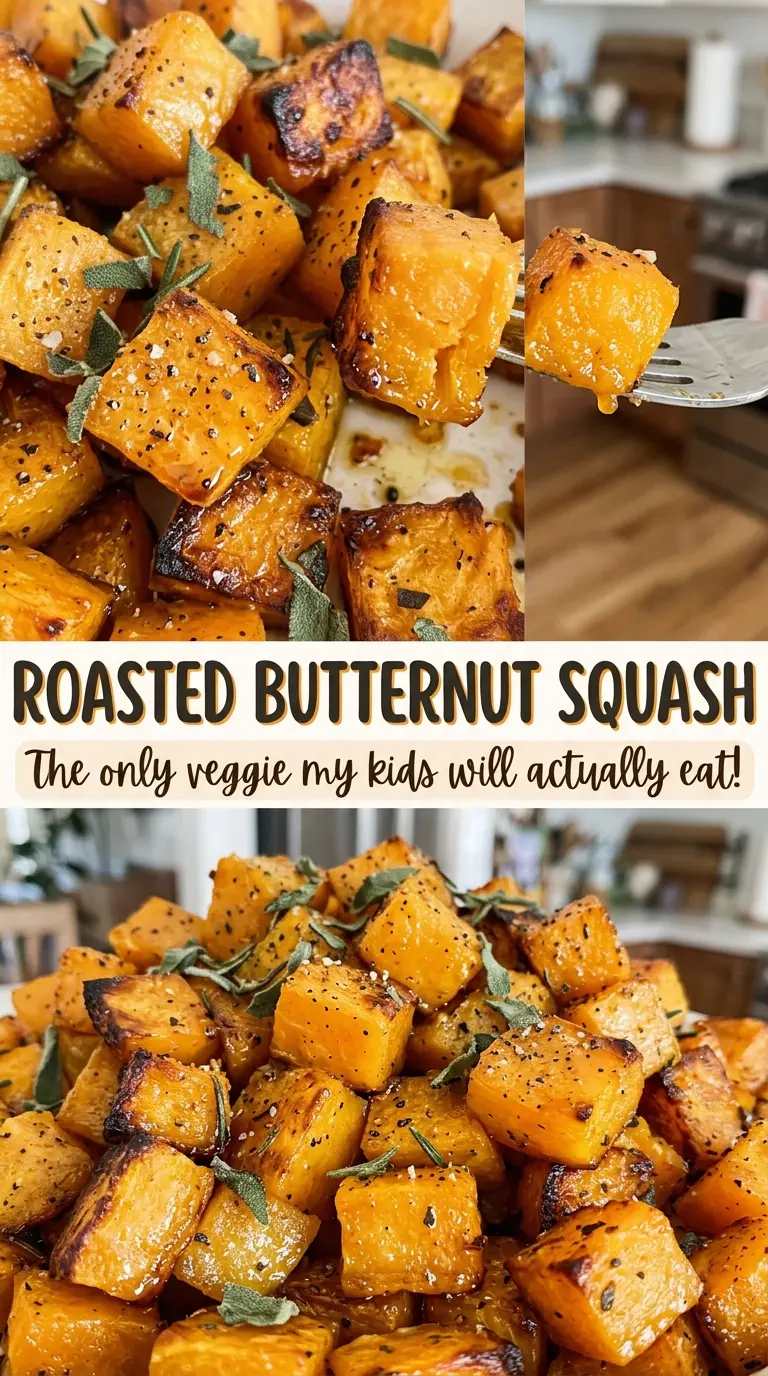
When the sheet comes out of the oven, the squash has browned edges and a fork slips easily into the middle. That contrast is what I want: tender pieces that…
Tip: save now, cook later.When the sheet comes out of the oven, the squash has browned edges and a fork slips easily into the middle. That contrast is what I want: tender pieces that still hold their shape, with caramelized corners instead of a tray of soft, pale cubes.
Roasted butternut squash needs little more than olive oil, salt, and pepper, but the cut and the way the pieces sit on the pan make a difference. I cut the squash into even cubes so they roast at the same pace, then give each piece room on the baking sheet. The result is a simple side dish with a mellow sweetness and enough savory seasoning to go with almost any dinner.
This is a good one to keep in your back pocket when you want a vegetable that can roast while you finish the rest of the meal. The squash softens inside as its edges turn golden, and a quick toss halfway through gives the pieces a chance to brown on more than one side.

Kitchen Note
Even 1-inch cubes are worth the little bit of extra care. If some pieces are much larger than the rest, the small ones soften before the large ones are ready.
Save this roasted butternut squash for an easy side with tender centers, browned edges, and a short list of pantry basics.
Why a Crowded Squash Tray Turns Soft Instead of Brown
Butternut squash releases moisture as it roasts. When the cubes are packed together, that moisture gets trapped between them, and the squash softens in the damp heat instead of browning cleanly at the edges. A single layer on a roomy rimmed baking sheet gives the hot oven air space to move around the pieces.
Use the 18×13-inch baking sheet for this batch, and spread the cubes out rather than piling them in the middle. A few pieces touching isn’t a problem; a dense blanket of squash is. If your pan is too crowded, browning becomes patchy and the pieces can turn soft before their surfaces take on color. The tray should look open enough that you can see the pan between most of the cubes.
This is also why I don’t add extra squash to the pan just to use up a whole vegetable. Keep the amount on the sheet manageable, and roast another batch if you have more. A little breathing room is what gives you browned edges alongside a tender center.
What the Squash and Oil Bring to the Pan
- Butternut squash — Choose a firm squash that feels heavy for its size, without soft spots or deep bruises. Its naturally sweet flesh becomes tender in the oven while the exposed surfaces brown. There isn’t a direct substitute that keeps the same flavor and timing; other winter squash can work, but its texture and roasting time may differ.
- Olive oil — Everyday olive oil is a good fit here; a premium bottle isn’t necessary because the squash is the main flavor. Extra-virgin olive oil brings a fruitier note, while avocado oil is the most useful neutral swap. Replace the olive oil with avocado oil in the same amount if you’d like a milder taste.
- Kosher salt — Salt brings out the squash’s sweetness and keeps the finished pieces from tasting flat. If you’re using fine table salt instead, use less by volume because its smaller grains pack more tightly than kosher salt.
- Ground black pepper — Ordinary preground pepper works well for this straightforward seasoning. Freshly ground pepper has a sharper aroma; white pepper can stand in at the same volume for a softer, less visible pepper note.
This recipe is naturally vegan and gluten-free with the listed ingredients, so it doesn’t need a special swap to fit either of those eating styles. The variations below change the seasoning while keeping the squash at the center of the dish.
Getting the Oil on Every Cube, Then Roasting Until the Edges Brown
Tossing the Seasoning Through the Squash
Heat the oven to 425°F. Put the peeled, seeded, 1-inch squash cubes in a large bowl with the olive oil, kosher salt, and ground black pepper. Toss until the surfaces look lightly coated rather than slick with oil. The bowl gives you room to turn the pieces without knocking them around on the baking sheet.
Spreading the Pieces on the Baking Sheet
Transfer the seasoned squash to an 18×13-inch rimmed baking sheet and arrange it in a single layer. Keep the pieces spread across the pan instead of heaping them up in the center. The rim helps contain any pieces as you toss them later. Before the pan goes into the oven, check that no large cluster is hiding along one edge.
Roasting and Tossing Halfway Through
Roast for 25 to 35 minutes, tossing the squash halfway through. The edges should be browned, and a fork should slide into the cubes without meeting a firm, crunchy center. Start checking toward the shorter end of the time range; the exact finish depends on the size of the pieces and how your oven runs. If the squash is tender but still pale, keep roasting until the edges have color.
Three Seasoning Changes That Still Let the Squash Shine
Smoky paprika edges
Add a little smoked paprika to the oil before tossing it with the squash. It gives the browned edges a gentle smoky note without covering the squash’s sweetness; use a light hand so the paprika doesn’t dominate.
Rosemary and garlic
Toss in dried rosemary and garlic powder along with the oil, salt, and pepper. The dried herbs cling well to the cubes and add a savory, woodsy edge. This version stays vegan and gluten-free with the same basic ingredients.
Maple with a little heat
Drizzle a little maple syrup over the roasted squash and finish with a pinch of red pepper flakes. Adding the syrup after roasting keeps its sweetness bright and avoids changing how the cubes brown in the oven. The pepper flakes cut through the extra sweetness.
Storage and Reheating
- Refrigerator: Refrigerate leftovers within 2 hours and keep them covered for 3 to 4 days. The squash softens a little more as it sits.
- Freezer: Freeze cooled squash in a sealed container for up to 3 months. It will be softer after thawing, so frozen leftovers are best in soups or blended dishes.
- Reheating: Spread the squash on a baking sheet and warm it in a 400°F oven until heated through, reaching 165°F. Avoid reheating it in a deep, crowded pile; the pieces will warm unevenly and lose more of their browned edges.
Questions That Come Up Before the Squash Goes in the Oven
Roasted Butternut Squash
Ingredients
Equipment
Method
- Heat the oven to 425°F.
- Toss the butternut squash with the olive oil, kosher salt, and ground black pepper in a large bowl, then spread it in a single layer on an 18x13-inch rimmed baking sheet.
- Roast for 25 to 35 minutes, tossing halfway through, until the squash is tender and browned at the edges.
