

No-Bake Pumpkin Mousse Cups
The buttered crumbs start to clump as soon as you stir them, and pressing them into the cups gives this dessert a proper base without turning on the oven. I…
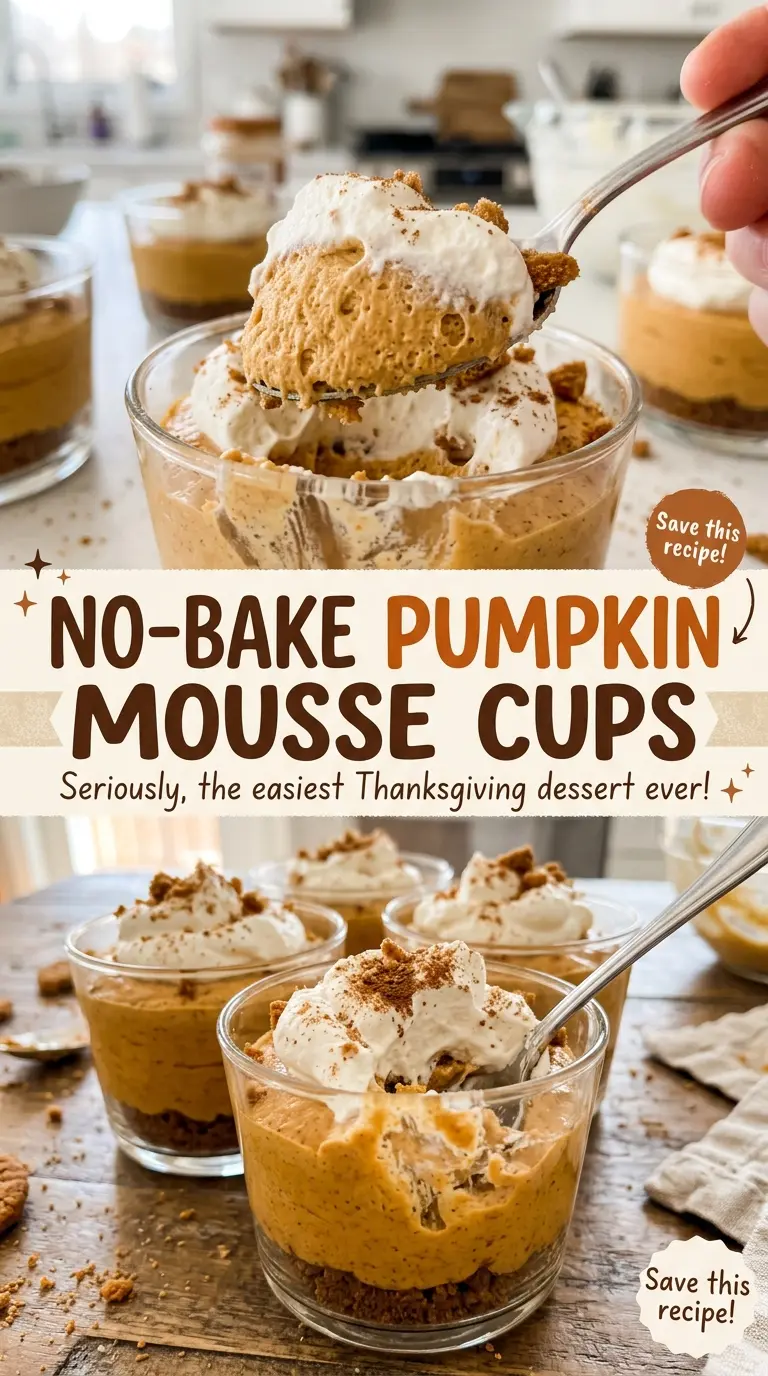
Tip: save now, cook later.The buttered crumbs start to clump as soon as you stir them, and pressing them into the cups gives this dessert a proper base without turning on the oven. I like that each serving is already portioned before the pumpkin mousse goes in. These no-bake pumpkin mousse cups have a creamy filling over a lightly sweet graham layer, with pumpkin pie spice giving the whole spoonful a familiar warmth.
Softened cream cheese gives the pumpkin a smooth starting point, so I beat it until there are no lumps before adding the puree and seasonings. The whipped cream goes in separately, which keeps the finished mousse light instead of dense. After a few hours in the refrigerator, the cups are cool, softly set, and ready to eat straight from the glass.

Kitchen Note
Stop beating the cold cream when it holds medium-stiff peaks. If it looks grainy or starts to clump, it has gone too far; smooth, stable peaks fold into the pumpkin mixture without leaving it heavy.
Save these no-bake pumpkin mousse cups for a make-ahead dessert with a buttery graham base and a softly spiced, creamy filling.
Why These Cups Need a Crumb Base, Not a Baked Crust
A crumb layer in an individual dessert cup has a different job from a pie crust. It doesn’t need to hold a slice together when it’s lifted from a pan; the glass does that work. The crumbs just need enough melted butter to cling together and a level press so each spoonful of mousse has a little buttery crunch underneath. That makes this a good fit for a no-bake dessert: there’s no blind-baking, cooling a crust, or worrying about a shell shrinking in the oven.
The small amount of granulated sugar in the crumbs helps round out their toasted, slightly salty graham flavor without making the base taste like a cookie. Press the mixture into an even layer rather than packing it into a hard disk. A dense, uneven base is harder to scoop through, while a level layer gives every cup a consistent bit of crumb. The mousse stays distinct above it, so you get both textures in the same bite.
What Gives the Pumpkin Mousse Its Smooth, Airy Texture
- Graham cracker crumbs — They bring a mild toasted flavor that works especially well with pumpkin spice. Store-brand crumbs are fine; if you want a sweeter, more vanilla-forward base, replace them with the same volume of finely crushed vanilla wafer crumbs.
- Cream cheese — The block-style cream cheese gives the pumpkin mixture body and a gentle tang. A standard store brand works well; soften it before beating, because cold cream cheese is much more likely to leave lumps. Tub-style whipped cream cheese is a poor swap here because its softer texture can leave the filling less sturdy.
- Pumpkin puree — Use plain pumpkin puree, not pumpkin pie filling, which is already sweetened and spiced. Canned puree is dependable and smooth. Homemade puree also works if it is thick rather than watery; excess liquid can make the mousse loose.
- Heavy cream — Cold heavy cream is what whips into the airy structure that lightens the cream cheese and pumpkin. Lower-fat milk or half-and-half won’t whip into the same peaks, so there isn’t a direct pour-in substitute for this part.
- Pumpkin pie spice and vanilla — These round out the pumpkin without burying it. Store-brand spice and vanilla extract are perfectly suitable; there’s no need for a specialty brand for a chilled dessert like this.
How to Layer the Crumbs and Fold a Stable Pumpkin Mousse
Press an even crumb layer into the cups
Stir the graham cracker crumbs with the melted butter and granulated sugar in a medium bowl until the crumbs look evenly moistened and start to clump. Divide them among six 8-ounce cups. Press each portion into an even layer; a spoon or the bottom of a small glass makes it easier to level the surface. If you see dry pockets, mix the crumbs a little more before portioning so the butter is distributed throughout.
Beat the pumpkin base until smooth
Beat the softened cream cheese in a large bowl until smooth before adding anything else. Then beat in the pumpkin puree, powdered sugar, pumpkin pie spice, vanilla extract, and kosher salt until the mixture is combined. Scrape the sides of the bowl if streaks of cream cheese cling there. The finished base should look uniform, with no pale lumps or separate streaks of pumpkin.
Whip the cream to medium-stiff peaks
Pour the cold heavy cream into a medium bowl and beat until medium-stiff peaks form. Lift the beaters to check: the cream should hold a peak that bends slightly at the tip rather than flowing back into the bowl. Stop at that point, since cream beaten until clumpy won’t fold smoothly into the pumpkin base. Keep the bowl steady and watch closely as the cream thickens.
Fold, portion, and chill until set
Fold the whipped cream into the pumpkin mixture in two additions, lifting from the bottom of the bowl and turning the mixture over instead of stirring briskly. The first addition loosens the base; the second should leave the mousse evenly colored and airy. Divide it among the prepared cups, cover them, and refrigerate for at least 2 hours, until chilled and set. The tops should look softly settled rather than liquid when you bring them to the table.
Two Easy Ways to Adapt These Pumpkin Mousse Cups
Make the crumb layer gluten-free
Use finely crushed gluten-free graham crackers in place of the regular graham cracker crumbs. Keep the butter and sugar in the crumb mixture the same; the base will still give you that buttery contrast, though the exact crunch depends on the cracker brand.
Serve the mousse without the crumb layer
For a lighter-feeling dessert, leave out the graham crumb mixture and divide the pumpkin mousse among the cups on its own. You’ll get a smooth, spiced mousse without the crunchy base, and the filling remains the focus.
Make-Ahead and Storage
- Make ahead: Assemble the cups a day before serving, cover them, and keep them chilled. The crumb layer gradually softens as it sits.
- Refrigerator: Keep covered and refrigerated; the mousse is at its best within about 2 days, and leftovers can be kept for 3 to 4 days. Discard cups left at room temperature for more than 2 hours.
- Freezer: Freezing isn’t recommended. The whipped-cream texture can turn less smooth after thawing.
- Serving: Serve cold, straight from the refrigerator. These are a chilled mousse, so there’s no reheating step.
Questions That Come Up When Making Pumpkin Mousse Cups
No-Bake Pumpkin Mousse Cups
Ingredients
Equipment
Method
- Mix the graham cracker crumbs, melted butter, and granulated sugar in a medium bowl.
- Divide the crumb mixture among six 8-ounce cups.
- Press the crumb mixture into even layers.
- Beat the cream cheese in a large bowl until smooth.
- Beat in the pumpkin puree, powdered sugar, pumpkin pie spice, vanilla extract, and salt until combined.
- Beat the heavy cream in a medium bowl until medium-stiff peaks form.
- Fold the whipped cream into the pumpkin mixture in two additions.
- Divide the mousse among the cups.
- Cover and refrigerate for at least 2 hours, until chilled and set.
