Loaded Oven Baked Nachos
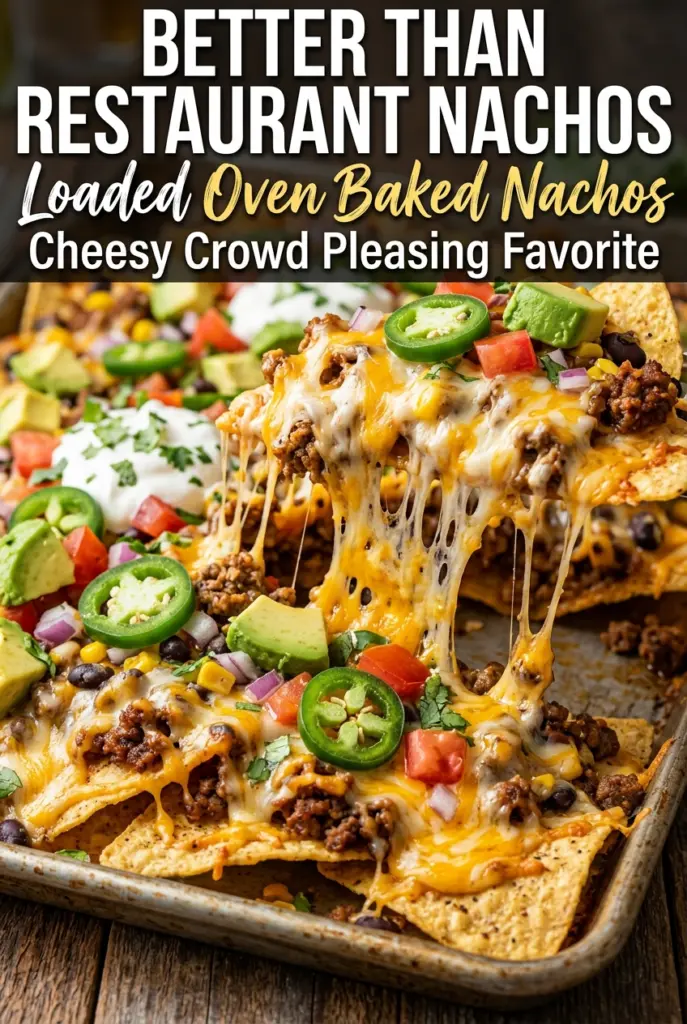
Loaded oven baked nachos hit the table with a mix of crisp edges, molten cheese, and just enough seasoned beef to keep every chip from feeling bare. The best trays…
Tip: save now, cook later.Loaded oven baked nachos hit the table with a mix of crisp edges, molten cheese, and just enough seasoned beef to keep every chip from feeling bare. The best trays are the ones where the chips stay sturdy underneath the toppings instead of collapsing into a soggy pile, and that comes down to how the layers are built and when the fresh toppings go on. When it’s done right, you get a tray that disappears fast because every bite has crunch, salt, heat, and creaminess all at once.
The trick is spreading the chips out in a single layer and using cheese as glue in two places: first under the beef and beans, then again over the top. That gives the toppings something to cling to and helps protect the chips from the moisture in the meat and fresh vegetables. The beef mixture only needs a short simmer after the seasoning goes in, just long enough to thicken and coat the meat instead of leaving extra liquid behind.
Below, I’ve laid out the small details that keep the nachos crisp, plus a few smart ways to adapt the tray for different crowds, different diets, or the leftovers sitting in your fridge.
The beef stayed juicy but not greasy, and the chips on the bottom were still crisp after baking. I loved how the cheese melted into the beans and held everything together.
These loaded oven baked nachos stay crisp on the edges and cheesy in the middle, so they’re perfect for game night when you need a tray that disappears fast.
The Chip-to-Topping Balance That Keeps Nachos Crunchy
The fastest way to ruin baked nachos is to pile everything on top of one heavy layer of chips. The bottom chips steam, the center gets soggy, and the whole tray turns into a fork-only situation. A wide baking sheet and a loose single layer give the heat space to circulate, which keeps the chips crisp long enough for the cheese to melt without turning the whole tray soft.
The other mistake is adding all the toppings before the bake. Fresh tomatoes, avocado, sour cream, and cilantro belong on after the oven, when the cheese has already melted and the chips have held their structure. The beef and beans bring enough moisture on their own, so the cheese has to go underneath and over the filling to create a barrier between the chips and the juicier ingredients.
- Layering matters more than exact topping order. Chips first, cheese, beef and beans, then more cheese. That second layer of cheese helps lock everything in place and gives you those stretchy bites people go back for.
- Use a sheet pan with real surface area. If the nachos are stacked thick in the middle, the edges overbake before the center melts.
- Drain the beef well. Extra grease makes the chips taste heavy and keeps the cheese from clinging the way it should.
What Each Ingredient Is Actually Doing in This Dish
The tortilla chips are the foundation, so sturdy restaurant-style chips work better than thin chips that break under the toppings. The cheese blend matters too: cheddar gives the sharp flavor, while Monterey Jack melts into that smooth, stretchy layer that makes nachos feel complete. If you only use cheddar, the topping can bake up a little tighter and less silky.
Ground beef needs enough seasoning and just enough moisture to carry the taco flavor, but not so much liquid that it pools on the pan. A packet of taco seasoning is the shortcut that works here because the spices are already balanced for this style of filling. Black beans add a creamy contrast and bulk without making the nachos feel meat-heavy, and they’re a good place to cut back on beef if you want to stretch the tray.
The fresh toppings do different jobs. Jalapeños bring heat before the bake, while tomatoes, avocado, green onions, cilantro, and sour cream cool everything down at the end. If you skip the fresh layer, the nachos still work, but they lose the contrast that keeps each bite interesting.
- Ground beef: Use 85/15 if you want flavor without a greasy tray. Leaner beef works too, but don’t let it dry out during browning.
- Cheddar and Monterey Jack: Pre-shredded is fine here, though freshly shredded melts a little cleaner because it doesn’t have the anti-caking coating.
- Black beans: Rinse and drain them well so the extra can liquid doesn’t seep into the chips.
- Sour cream and avocado: These finish the dish, so keep them cold until the last minute for the best contrast against the hot cheese.
Building the Tray So the Cheese Melts Before the Chips Burn
Brown the Beef Until the Pan Is Barely Glossy
Heat the olive oil in a skillet over medium heat, then cook the ground beef until the pink is gone and the meat starts to pick up a little color. If the pan is crowded, the beef will steam and stay pale, which gives you a softer, wetter filling. Drain off the excess grease before the seasoning goes in so the taco spices can cling to the meat instead of floating in fat.
Let the Seasoning Reduce, Not Soupy-Simmer
Stir in the taco seasoning and water, then let the mixture simmer until the liquid tightens around the beef and barely coats the spoon. Three minutes is usually enough. If it still looks loose, keep it on the heat a minute or two longer; soggy beef is the main reason nachos collapse.
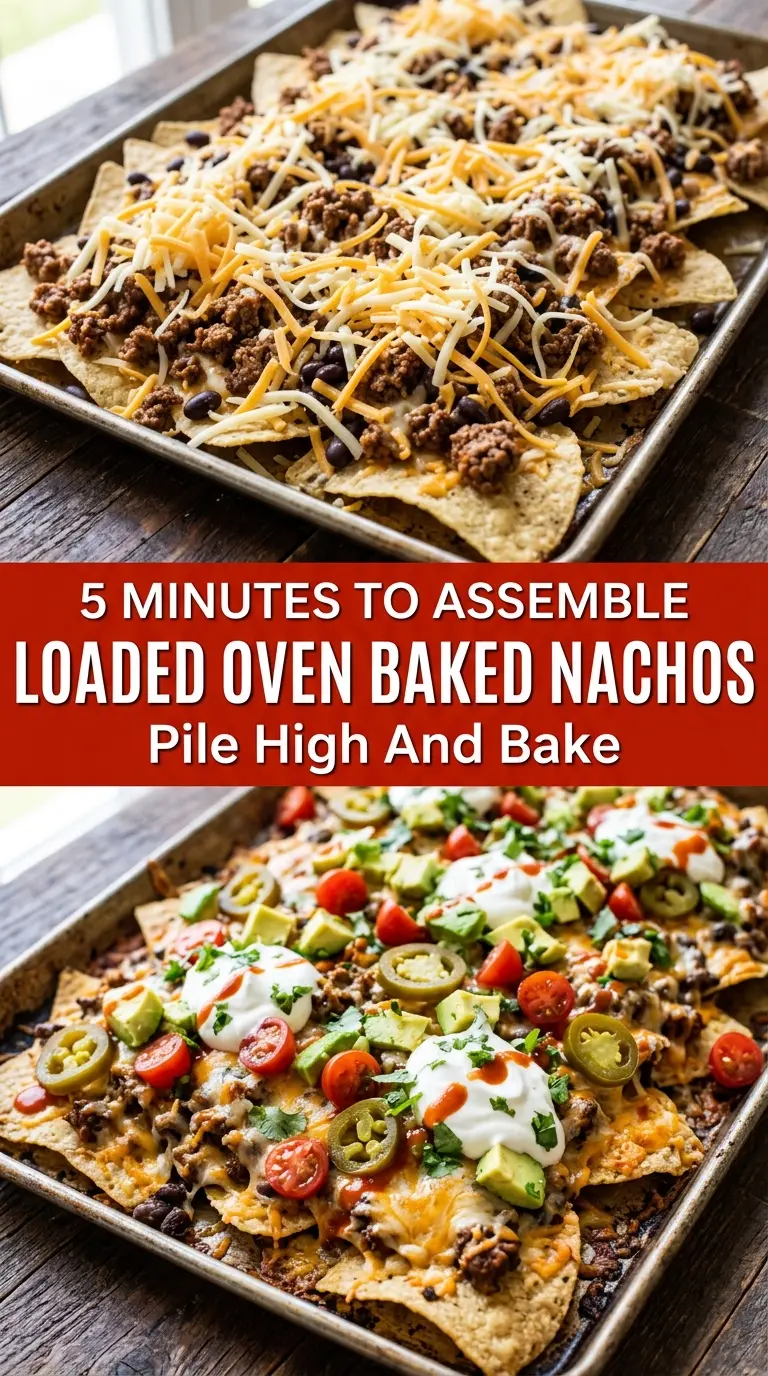
Build in Layers, Not Piles
Spread the chips across a large baking sheet, then add half the cheese first. Spoon the beef and black beans over that layer, then finish with the rest of the cheese and the jalapeños. That bottom layer of cheese acts like a barrier, so the meat juices don’t go straight into the chips.
Bake Until the Cheese Moves as One
Bake at 400°F just until the cheese is fully melted and starting to bubble at the edges, usually 8 to 10 minutes. The chips shouldn’t darken much during this time. If you leave the tray in until the edges brown deeply, the cheese will tighten and the chips underneath will keep softening while you wait.
Finish With Cold Toppings
The tomatoes, avocado, olives, green onions, cilantro, and sour cream go on after the tray comes out of the oven. That keeps the fresh toppings bright and stops the avocado from turning mushy. Serve immediately, while the cheese is still glossy and the chips around the edge are crisp enough to snap.
Three Smart Ways to Change the Tray Without Losing the Crunch
Make It Vegetarian With Beans as the Main Filling
Skip the beef and double the black beans, or use a mix of black beans and pinto beans for a fuller, softer filling. Add the taco seasoning to a small splash of oil and a spoonful of water so the beans pick up more flavor before they go on the chips. The result is lighter, but still hearty enough that nobody feels like something is missing.
Go Dairy-Free With a Melty Alternative
Use your favorite dairy-free shredded cheese that melts well, not one that just softens. Some brands brown before they really melt, so keep a close eye on the tray and pull it as soon as the cheese looks glossy and loose. The flavor changes a little, but the crisp chips and seasoned beef still carry the dish.
Turn It Into a Crowd-Sized Party Tray
Use two sheet pans instead of trying to stack everything on one. That keeps the chips in a real single layer and helps both pans bake evenly. If you crowd the tray to save dishes, the middle will steam before the cheese has time to melt cleanly.
Storage and Reheating
- Refrigerator: Store leftovers up to 2 days, though the chips soften as they sit.
- Freezer: Not a good freezer dish. The chips lose their texture and the fresh toppings don’t hold up.
- Reheating: Reheat the beef and bean mixture separately if possible, then build a fresh tray. If the nachos are already assembled, warm them briefly in a 350°F oven just until the cheese loosens again. The microwave makes the chips chewy and the avocado unpleasant.
Answers to the Questions Worth Asking

Loaded Oven Baked Nachos
Ingredients
Equipment
Method
- Preheat the oven to 400°F (200°C) with the rack positioned in the middle. This prepares the oven for even crisping.
- Heat the olive oil in a cast iron skillet over medium heat until shimmering. This cues the skillet is hot enough to brown the beef.
- Add the ground beef to the skillet and cook until fully cooked, breaking it up as it browns. The visual cue is no pink remains.
- Drain excess grease from the skillet. This keeps the nachos from becoming oily.
- Stir in the taco seasoning and water, then simmer for 3 minutes. The mixture should look evenly coated and slightly thickened.
- Spread the tortilla chips evenly on a large sheet pan. Keep a single layer so they bake crisp.
- Sprinkle half the shredded cheddar cheese over the chips. You want the chips visibly coated with cheese.
- Add the seasoned beef and black beans over the cheese layer. Distribute so toppings are spread across the pan.
- Top with the remaining shredded cheddar cheese, the shredded Monterey Jack cheese, and the sliced jalapeños. The surface should be fully covered for melting.
- Bake for 8–10 minutes at 400°F (200°C) until the cheese melts and bubbles. Watch for lightly browned cheese edges.
- Remove the nachos from the oven. The cheese should still be fluid and glossy.
- Top with the diced Roma tomato, sliced black olives, and diced avocado. Add these on top so they stay fresh and vibrant.
- Finish with the sliced green onions, chopped cilantro, and sour cream. Serve immediately so the chips stay crisp.
