

Garlic Herb Pull-Apart Dinner Rolls
When the yeast mixture turns foamy, the dough is off to a good start; when it feels slightly tacky after kneading, it’s ready to rise. Those two cues make these…
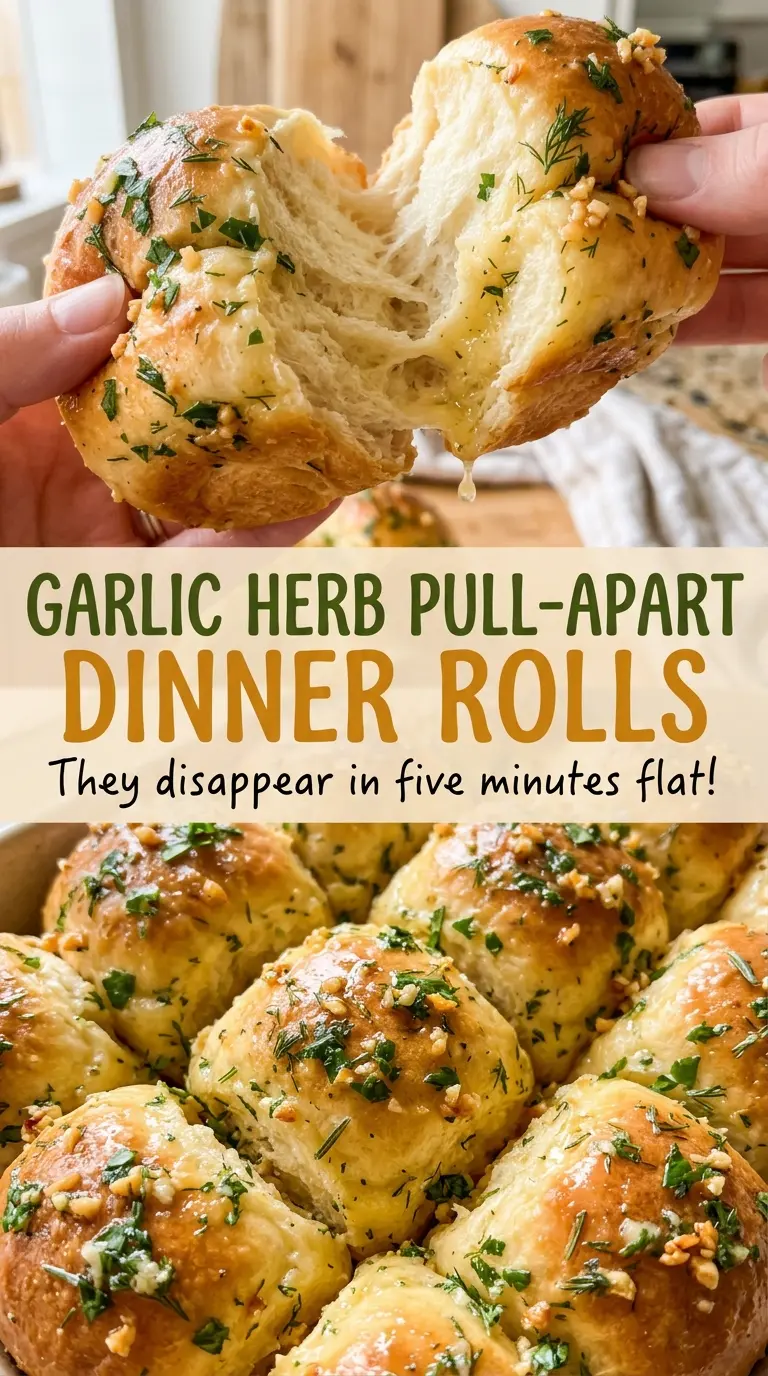
Tip: save now, cook later.When the yeast mixture turns foamy, the dough is off to a good start; when it feels slightly tacky after kneading, it’s ready to rise. Those two cues make these Garlic Herb Pull-Apart Dinner Rolls much easier to judge than watching the clock alone. I arrange the dough balls in three rows in a 9×13-inch baking dish, where they puff up together and bake into a soft center with golden tops.
The garlic butter gets its own short turn on the stove while the rolls bake. Cooking the minced garlic gently keeps it fragrant, and brushing the mixture over the rolls as soon as they come out of the oven lets it cling to the warm tops. After five minutes of resting, the rolls pull apart easily, with parsley and garlic in every buttery bite.

Kitchen Note
Let the melted butter cool before it goes into the dough. Butter that’s still hot can interfere with the yeast, so I give it a few minutes while I get the other ingredients ready.
Save these Garlic Herb Pull-Apart Dinner Rolls for a meal that needs warm, golden rolls with a fragrant garlic-butter finish.
The Garlic Butter Goes on After the Oven for a Reason
Garlic is easy to overcook when it’s exposed to oven heat for the full bake. Here, it gets a brief, gentle cook in butter on the stovetop, then goes onto the rolls only after they’re baked. That gives the garlic time to turn fragrant without letting it brown, which keeps the topping savory instead of bitter.
The timing also helps the topping do its job. Hot rolls give the melted butter a warm surface to settle into, so the parsley and garlic spread across the tops rather than sitting in a cold, separate layer. I make the topping while the rolls are in the oven, which means it’s ready to brush on as soon as the baking dish comes out. Keep the saucepan over low heat and take it off the burner as soon as the garlic smells fragrant; waiting for color is too long.
Milk Temperature and Butter Timing Set the Dough Up to Rise
- Whole milk and active dry yeast — The milk’s temperature matters because it activates the yeast without overheating it. Use a thermometer to bring the milk to 105–110°F; very hot milk can keep the yeast from working properly. Give the mixture the full five to ten minutes to become foamy before moving on.
- All-purpose flour and fine salt — All-purpose flour gives these rolls their tender, pull-apart crumb, while salt seasons the dough and balances its sweetness. The dough should feel slightly tacky after kneading, not dry. Adding extra flour just to make it less sticky can leave the baked rolls dense.
- Egg and unsalted butter — The egg and butter enrich the dough, helping it bake up tender rather than lean and crusty. Unsalted butter keeps the salt level predictable. The butter is divided between the dough and the topping, so keep those portions separate as you prep.
- Fresh garlic and parsley — Finely minced garlic spreads evenly through the topping, and chopped fresh parsley brings a fresh, green note. Fresh garlic matters here because the topping cooks briefly; pre-minced garlic can brown differently. If parsley isn’t available, you can leave it out and brush on the garlic butter without it.
From Foamy Yeast to Rolls That Pull Apart Cleanly
Wake Up the Yeast
Stir the warm milk, sugar, and active dry yeast together in a large bowl, then leave the mixture for five to ten minutes. Look for foam across the surface before adding anything else. If it stays flat, the yeast may be old or the milk may have been outside the right temperature range. Starting with a foamy mixture gives the dough a better chance of rising on schedule.
Knead Until the Dough Turns Smooth
Stir the egg and cooled melted butter into the yeast mixture, then mix in the flour and salt until a shaggy dough forms. Knead by hand on a clean counter for eight to ten minutes, or use a stand mixer with a dough hook for six to eight minutes. The dough should become smooth and elastic while remaining slightly tacky. If it feels sticky, resist piling on flour; a little tackiness is the texture you want.
Give the Dough Its First Rise
Cover the bowl and leave the dough at room temperature for one to one and a half hours, until it has doubled in size. The visual cue matters more than a precise minute count, since room temperature affects how quickly dough rises. If it hasn’t doubled, give it more time rather than moving on just because the clock says the minimum has passed. A properly risen dough is noticeably fuller and softer to the touch.
Shape, Proof, and Bake Until Golden
Spray a 9×13-inch baking dish with nonstick cooking spray, divide the dough into 12 equal pieces, shape them into balls, and arrange them in three rows of four. Cover and let them rise for 30 to 45 minutes, until puffy and touching; preheat the oven to 350°F during this second rise. Bake for 20 to 25 minutes, until golden brown and the center rolls reach about 190°F. If the tops look ready before the centers reach that temperature, keep baking and check the center again.
Brush on the Garlic Herb Butter
While the rolls bake, melt the reserved butter in a small saucepan over low heat. Add the minced garlic and stir for 30 to 60 seconds, stopping when it’s fragrant and before it browns. Take the pan off the heat and stir in the chopped parsley. Brush the mixture over the hot rolls, then let them rest for five minutes before serving.
Two Small Changes for a Different Garlic-Herb Finish
Leave out the garlic
For a milder topping, skip the minced garlic and stir the parsley into the melted butter instead. The rolls keep their buttery finish, with a gentler, fresh-herb flavor.
Leave out the parsley
Skip the parsley and keep the garlic butter as it is. The topping will taste more directly of garlic and butter, without the fresh herbal note.
Storage and Reheating
- Refrigerator: These rolls keep their texture better at room temperature. Store them airtight for up to 2 days; refrigeration tends to dry bread out.
- Freezer: Once completely cool, wrap the rolls tightly and freeze for up to 2 months for the best quality. Thaw before warming.
- Reheating: Warm the rolls in a 350°F oven until heated through. Avoid leaving them uncovered longer than necessary, since that can dry the tops.
Questions That Come Up While These Rolls Rise and Bake
Garlic Herb Pull-Apart Dinner Rolls
Ingredients
Equipment
Method
- In a large bowl, stir together the warm milk, sugar, and yeast; let stand for 5-10 minutes, until foamy.
- Stir in the egg and 4 tablespoons melted, cooled butter.
- Mix in the flour and salt until a shaggy dough forms.
- Knead by hand on a clean counter for 8-10 minutes or with a stand mixer and dough hook for 6-8 minutes, until smooth and elastic; the dough should feel slightly tacky.
- Cover the bowl and let the dough rise at room temperature for 1-1 1/2 hours, until doubled in size.
- Spray a 9x13-inch baking dish with nonstick cooking spray.
- Divide the dough into 12 equal pieces, shape each into a ball, and arrange them in 3 rows of 4 in the dish.
- Cover the rolls and let rise for 30-45 minutes, until puffy and touching.
- Preheat the oven to 350°F during this rise.
- Bake for 20-25 minutes, until golden brown and the center rolls reach about 190°F.
- While the rolls bake, melt the reserved 3 tablespoons butter in a small saucepan over low heat.
- Add the garlic and cook, stirring, for 30-60 seconds, until fragrant but not browned.
- Remove from the heat and stir in the parsley.
- Brush the garlic herb butter over the hot rolls and let them rest for 5 minutes before serving.