Classic Chicken Pot Pie
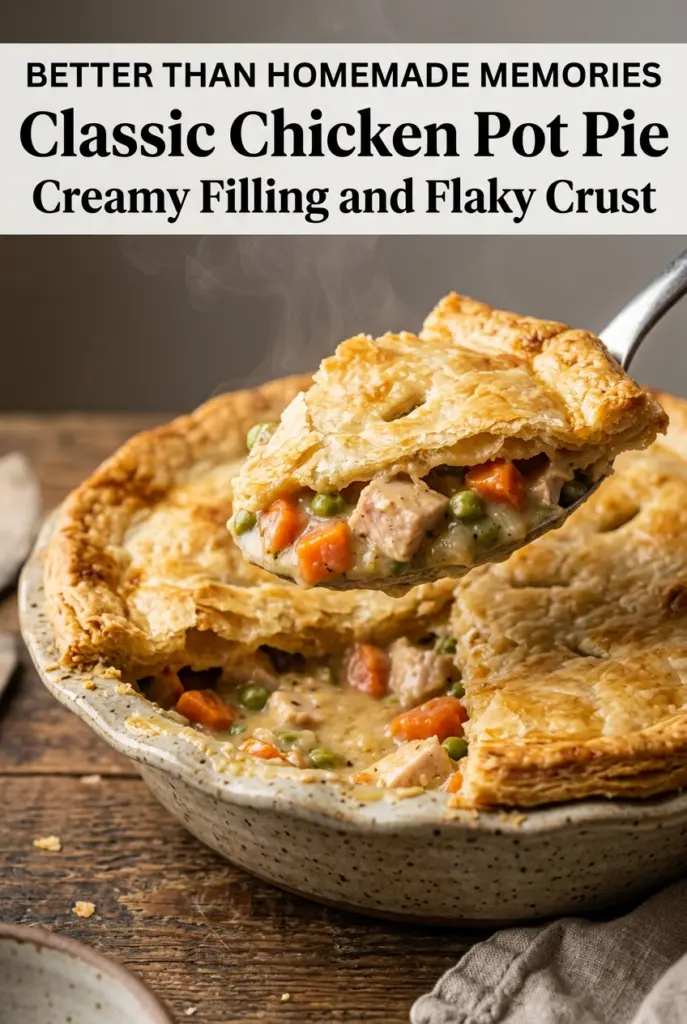
Flaky crust, creamy filling, and tender chicken tucked under a deep golden top crust — that’s what makes a proper chicken pot pie worth putting on repeat. The filling should…
Tip: save now, cook later.Flaky crust, creamy filling, and tender chicken tucked under a deep golden top crust — that’s what makes a proper chicken pot pie worth putting on repeat. The filling should hold together when you spoon it out, not slump into a loose soup, and the crust should shatter a little when your fork goes in. When both parts are done right, the first serving disappears fast.
This version leans on a simple stovetop sauce built from butter, flour, broth, and milk, which gives you that rich, spoon-coating texture without needing anything fancy. Cooking the vegetables in the butter first softens their edges and pulls a little sweetness out of the onion and carrot, while the thyme keeps the whole dish tasting like comfort food instead of just creamy chicken. Using refrigerated pie crust keeps the focus on the filling and makes this weeknight-friendly without tasting shortcut-heavy.
Below, I’ll walk through the part that matters most: getting the sauce thick enough before it goes into the crust. I’ve also included the swaps that still work if you need to use what’s in the fridge, plus the storage notes that help the leftovers reheat without turning soggy.
The filling thickened up beautifully and didn’t run all over the plate when I sliced it. My husband kept going back for seconds because the crust stayed crisp on top even after dinner sat for a few minutes.
Save this flaky-topped chicken pot pie for the kind of dinner that needs a creamy filling, crisp crust, and leftovers that still taste like you cooked from scratch.
The Reason This Pot Pie Holds Its Shape Instead of Turning Soupy
The filling has to be thicker than you think before it goes into the crust. It should coat the back of a spoon and leave a clean line when you drag a finger through it. If it still looks loose in the skillet, it will stay loose in the pie dish, and the bottom crust will pay for it.
The other common miss is rushing the flour step. A full minute of cooking the flour in the butter gets rid of that raw paste taste and gives the sauce a better chance of thickening evenly once the broth and milk go in. Whisk steadily as the liquid is added, and keep the heat at a calm simmer rather than a hard boil so the sauce stays smooth.
What Each Ingredient Is Doing in the Filling
- Cooked chicken — Rotisserie chicken works well here, and any leftover roasted chicken is fair game. Dice or shred it into bite-size pieces so it spreads through the filling instead of clumping in one heavy layer.
- Carrots, celery, and onion — This is the classic base that gives the pie its savory backbone. Cut the carrots small enough that they soften in the short stovetop cooking time; large chunks can stay crunchy after baking.
- Butter, flour, broth, and milk — These four build the sauce. The butter and flour form the roux, the broth brings savory depth, and the milk rounds everything out into a creamy filling; swapping in low-fat milk is possible, but the sauce will taste thinner and won’t feel as plush.
- Thyme, garlic powder, salt, and pepper — Thyme is the seasoning that makes this taste like pot pie instead of chicken gravy with vegetables. Dried thyme holds up well here, but fresh thyme can be used if you double the amount.
- Refrigerated pie crusts — This is the practical shortcut that keeps the recipe weeknight-friendly. Let the crust sit out just long enough to stop cracking; if it gets too warm, it turns soft and is harder to crimp cleanly.
Building the Filling, Sealing the Crust, and Baking It Through
Softening the Vegetables First
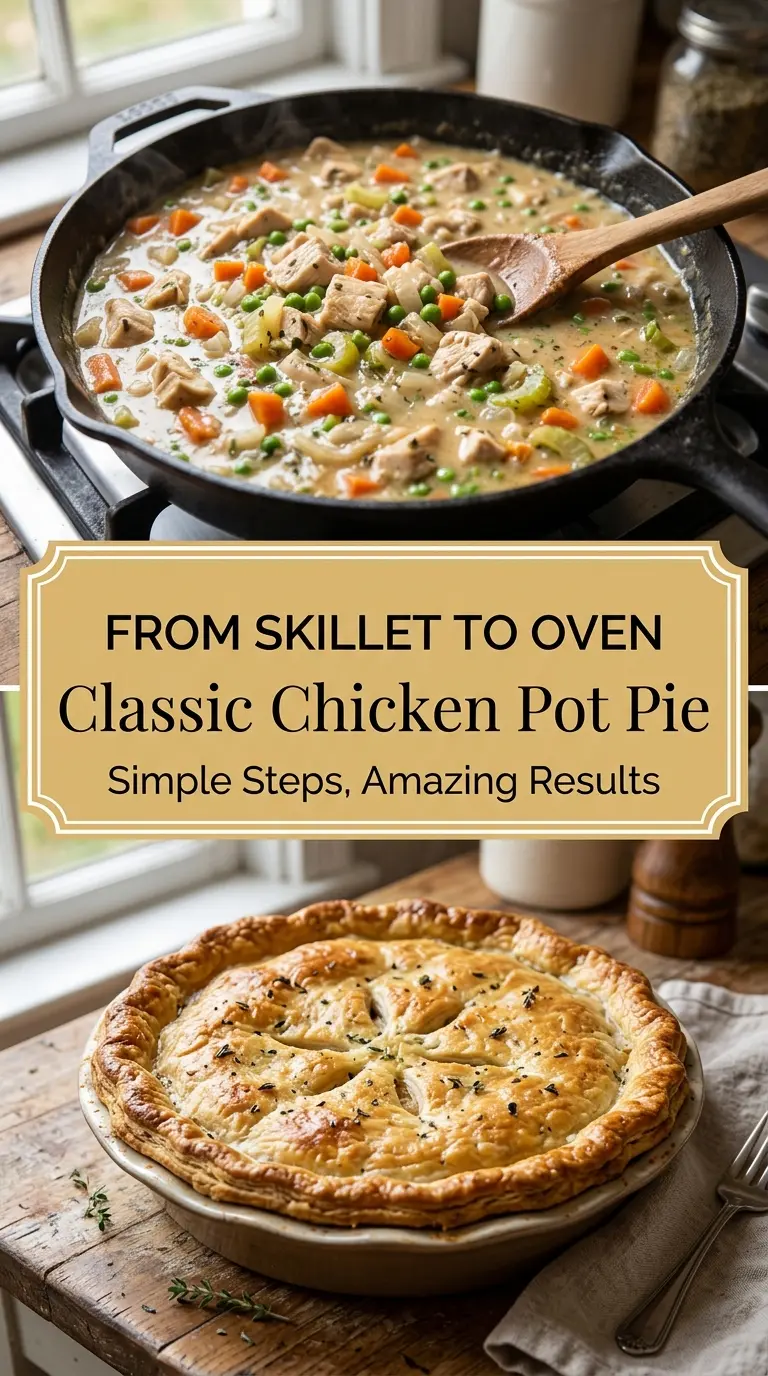
Melt the butter in a large skillet over medium heat, then cook the onion, carrots, and celery until the onion looks glossy and the carrots have started to take on a little color around the edges. That early cooking matters because the vegetables finish in the oven, but they need a head start on the stove. If you skip this part or rush it, the filling tastes flat and the carrots can stay too firm.
Making the Sauce Thick Enough
Stir in the flour and cook it for about a minute before adding the broth and milk slowly, whisking the whole time. The mixture should go from gritty and pasty to smooth and silky. Keep the heat moderate; if the pan is too hot, the sauce can get lumpy before it has a chance to thicken evenly. Once it simmers, it should look like a thick gravy that mounds slightly when stirred.
Filling and Topping the Pie
Stir in the chicken and peas after the sauce has thickened, then transfer everything to the pie dish while it’s still hot and spoonable. Lay the top crust over the filling, trim any extra dough, and crimp the edges so the filling doesn’t leak out as it bakes. Cut a few slits in the top for steam to escape; without them, the crust can puff unevenly and the filling may bubble over the sides.
Baking Until the Crust Goes Deep Gold
Brush the top with beaten egg for shine and color, then bake until the crust is a deep golden brown and the filling is actively bubbling through the vents. That bubbling is your cue that the center is hot all the way through. Let the pie rest for about 10 minutes before slicing so the filling settles and the first piece holds together.
How to Adapt This Chicken Pot Pie for What You Have on Hand
Dairy-Free Version
Use plant-based butter and unsweetened oat or almond milk. The filling will still thicken because the flour does the work, but the flavor will be a little less rich, so lean on the thyme and black pepper for balance.
Gluten-Free Swap
Use a cup-for-cup gluten-free flour blend in the roux and a gluten-free pie crust. The sauce may thicken a touch faster, so watch the simmer and stop as soon as it coats the spoon.
Using Leftover Turkey Instead of Chicken
Leftover turkey works the same way and brings a slightly deeper, roastier flavor. Fold it in at the end just like the chicken, and keep the seasoning the same unless your turkey was already heavily salted.
Storage and Reheating
- Refrigerator: Store leftovers covered for up to 4 days. The crust softens a little as it sits, but the filling stays flavorful.
- Freezer: Freeze baked slices or the whole pie tightly wrapped for up to 2 months. For the best texture, cool it fully first so condensation doesn’t make the crust soggy.
- Reheating: Reheat in a 350°F oven until the center is hot and the crust crisps back up, usually 20 to 30 minutes for slices. The microwave will warm it faster, but it softens the crust and makes the filling steam instead of stay creamy.
Answers to the Questions Worth Asking

Classic Chicken Pot Pie
Ingredients
Equipment
Method
- Preheat oven to 400°F (200°C) to get ready for baking the pie crust.
- Melt butter in a large skillet over medium heat until it turns glossy.
- Add onion, carrots, and celery, then cook for 5 minutes until they begin to soften and smell fragrant.
- Stir in flour and cook for 1 minute to remove the raw flour taste, keeping the mixture smooth.
- Gradually whisk in chicken broth and milk, stirring until thickened and creamy.
- Add garlic powder, thyme, salt, and black pepper, then simmer until thick and creamy, stirring occasionally to prevent sticking.
- Stir in chicken and peas until evenly combined and the filling is hot throughout.
- Transfer the filling to a 9-inch pie dish.
- Place one pie crust over the filling and crimp the edges to seal.
- Cut small slits in the top crust so steam can escape during baking.
- Brush the top crust with beaten egg for a golden finish.
- Bake for 35–40 minutes at 400°F (200°C) until golden brown and visibly bubbling at the slits.
- Let cool for 10 minutes before serving so the filling sets up and slices cleanly.
