
Triple Berry Cheesecake Trifle
Layers of soft pound cake, cloud-like cheesecake filling, and glossy berries make this trifle the kind of dessert people keep circling back to with a spoon. The contrast is what…
Tip: save now, cook later.Layers of soft pound cake, cloud-like cheesecake filling, and glossy berries make this trifle the kind of dessert people keep circling back to with a spoon. The contrast is what makes it work: tangy cream cheese against sweet cream, juicy berries against buttery cake, and just enough structure that every scoop looks as good as it tastes.
The trick is keeping each layer distinct. The berries macerate with sugar and lemon juice until they turn syrupy, which keeps the trifle from tasting flat, and the whipped cream gets folded into the cream cheese base so the filling stays light instead of dense. I also like using store-bought pound cake here because it holds up better than a softer cake once the juices start running through the bowl.
Below, I’m walking through the texture cues that matter most, plus a few swaps that help when you need to make this ahead or adapt it to what’s in the fridge.
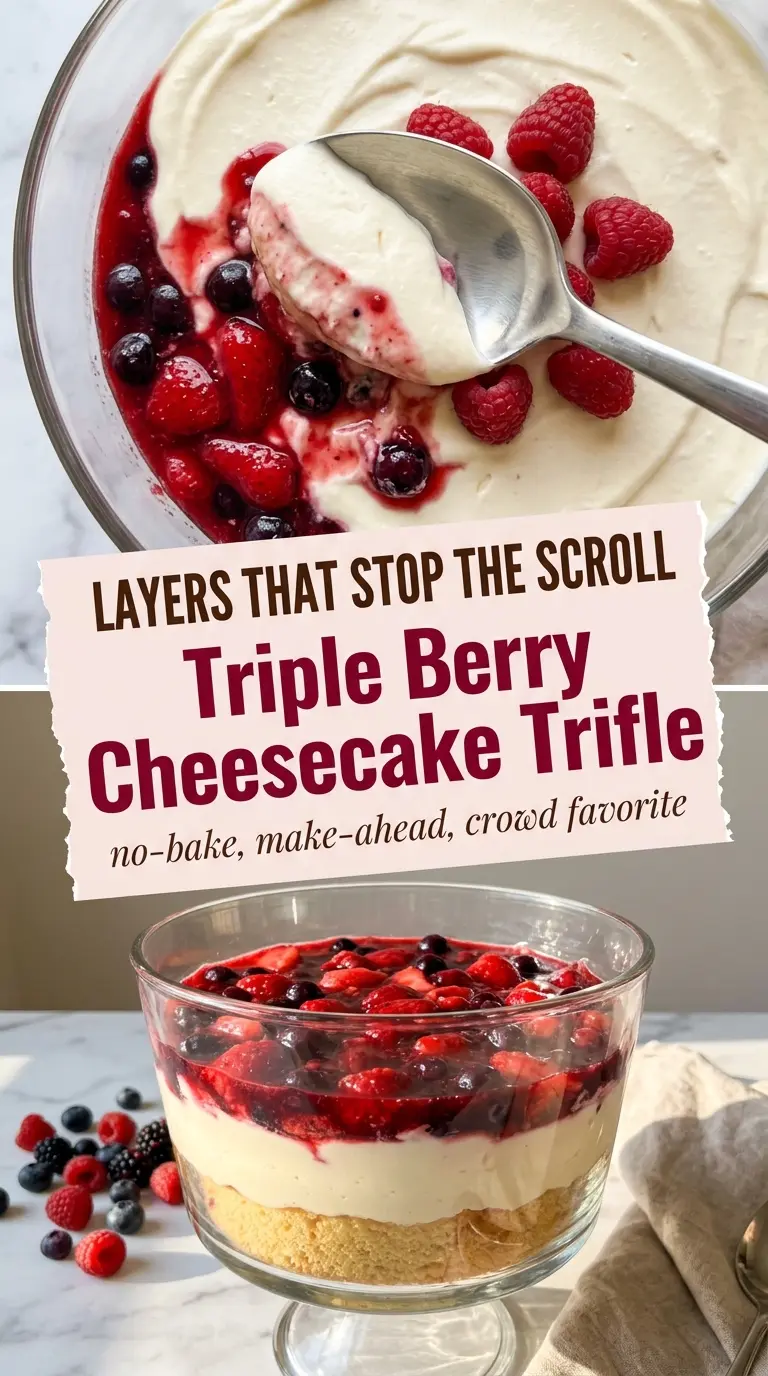
The berries got glossy and syrupy after 15 minutes, and the cheesecake layer stayed fluffy even after chilling overnight. Everyone kept asking where I bought the trifle bowl.
Save this Triple Berry Cheesecake Trifle for the kind of dessert that looks bakery-fancy but comes together in under 30 minutes.
The Reason This Trifle Stays Tall Instead of Turning Soggy
The difference between a trifle that looks layered and one that turns into a bowl of mush comes down to moisture control. The berries need time to release some juice, but not so much that they flood the cake. That’s why a short maceration works here: you get glossy fruit and a little syrup, not soup.
The other piece that matters is the filling. Whipping the cream separately before folding it into the cream cheese keeps the texture airy, which gives the trifle lift between the cake and berries. If you beat everything together at once, the filling gets heavier and the whole dessert settles faster in the bowl.
- Cream cheese — Use full-fat blocks, not tub cream cheese. Blocks soften and beat smoothly, which is what gives the filling that clean, rich texture.
- Heavy whipping cream — Cold cream whips to stable peaks and turns the cream cheese base into a mousse-like filling. Half-and-half won’t do the job here.
- Powdered sugar — This sweetens the filling without leaving any graininess. Granulated sugar can work in a pinch, but it won’t dissolve as seamlessly.
- Pound cake — Store-bought pound cake is the easiest choice because it’s sturdy enough to handle the berries. If you bake your own, let it cool completely before cubing so it doesn’t smear or compress.
- Strawberries, blueberries, and raspberries — The mix gives you sweetness, tartness, and color in every spoonful. Fresh berries work best because frozen berries bleed too much juice and soften the layers too fast.
- Lemon juice — A little acid wakes up the berries and keeps the trifle from tasting one-note. Bottled lemon juice won’t have the same brightness, but it can work if that’s what you have.
How to Build the Layers So the Trifle Holds Its Shape
Let the Berries Turn Juicy, Not Watery
Toss the sliced strawberries, blueberries, raspberries, sugar, and lemon juice together and let them sit until the fruit looks shiny and a little syrup collects at the bottom. Fifteen minutes is enough. If you leave them too long, especially with raspberries, they start collapsing and the juices get harder to manage in the bowl.
Whip the Filling in Two Separate Stages
Beat the softened cream cheese and powdered sugar until the mixture is completely smooth before anything else goes in. You want no little lumps left behind, because once they’re folded into whipped cream, they won’t disappear. Whip the cream to stiff peaks in a cold bowl, then fold it in gently so the filling stays fluffy and doesn’t turn loose.
Layer with a Light Hand
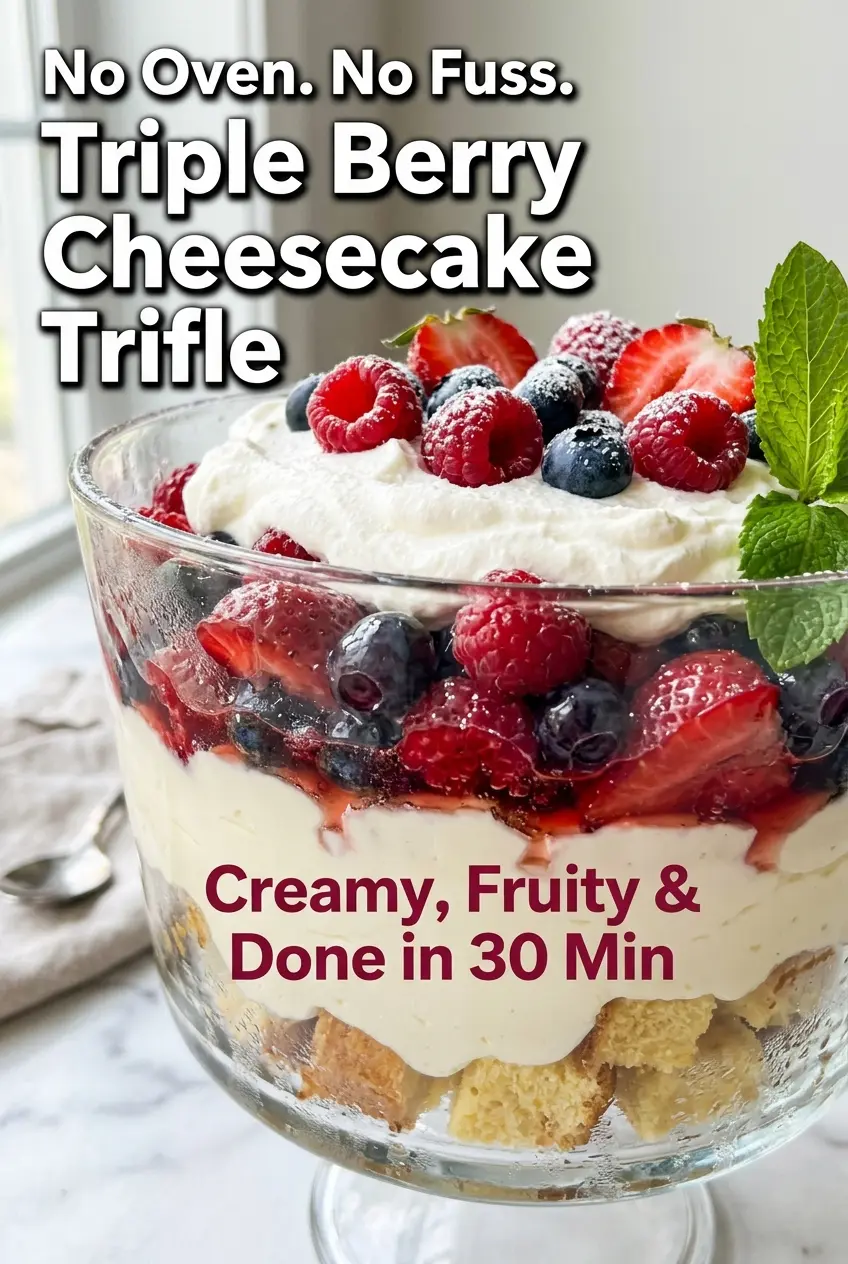
Start with cake, then cheesecake filling, then berries, repeating the pattern until you reach the top. Press the cake down only slightly so it catches the cream without becoming compacted. If you pack the layers too tightly, the juices can’t settle between them and the trifle loses that clean striped look when you scoop it.
Finish with a Tall, Clean Top
The top layer is where this dessert earns its showpiece look. Pipe or spoon on whipped cream, then add whole berries and a few mint leaves right before serving. If you garnish too early, the mint wilts and the berries lose their fresh shine.
Three Ways to Adapt the Trifle Without Losing the Good Part
Dairy-Free Version With Coconut Whipped Cream
Use a dairy-free cream cheese and whip chilled coconut cream instead of heavy cream. The filling will be a little less tangy and a touch softer, but it still layers well if you chill the coconut cream thoroughly first and beat it until firm before folding.
Gluten-Free Trifle With a Sturdy GF Cake
Swap in a gluten-free pound cake or dense vanilla loaf cake that can hold up under the fruit. Soft, airy gluten-free cakes can break apart quickly once the juices soak in, so lean toward a firmer style with a tighter crumb.
Extra Berry, Less Sweet Version
Cut the powdered sugar in the filling back by a couple of tablespoons and add a few more raspberries to the fruit layer. That gives the trifle a sharper, more berry-forward finish and keeps it from leaning too sweet after it chills.
Storage and Reheating
- Refrigerator: Store covered for up to 2 days. After that, the cake starts to soften and the berry juices loosen the layers more than you want.
- Freezer: I don’t recommend freezing this trifle. The whipped filling and fresh berries lose their texture after thawing, and the cake turns spongy in a way that can’t be fixed.
- Reheating: No reheating needed. Serve it cold straight from the fridge; if it’s been chilled overnight, let it sit out for 10 minutes so the filling softens slightly and the flavors open up.
Questions I Get Asked About This Recipe
Triple Berry Cheesecake Trifle
Ingredients
Equipment
Method
- In a bowl, combine the fresh strawberries, fresh blueberries, fresh raspberries, granulated sugar, and fresh lemon juice, then toss gently until evenly coated. Let sit for 15 minutes at room temperature until juices release and the berries look glossy.
- In a mixing bowl, beat the cream cheese and powdered sugar on medium speed until completely smooth and fluffy, about 2 minutes. Scrape the sides as needed so the texture stays silky.
- Add the vanilla extract and mix just until combined. The filling should look uniform in color with no streaks.
- In a separate chilled bowl, whip the cold heavy whipping cream on high speed until stiff peaks form, about 3–4 minutes. Stop when the cream holds peaks and looks airy, not grainy.
- Gently fold the whipped cream into the cream cheese mixture in three additions until smooth and cloud-like, without overmixing. Fold slowly so the filling stays thick and fluffy.
- Cut the store-bought pound cake into roughly 1-inch cubes. If you want extra structure, toast on a sheet pan at 350°F for 5–7 minutes, then cool slightly.
- Layer one-third of the store-bought pound cake cubes in the bottom of a large trifle bowl or clear glass dish. Aim for an even, flat base.
- Spoon one-third of the cheesecake filling over the cake. Spread gently so the filling reaches the edges.
- Spoon one-third of the macerated berries over the filling, letting berry juices drip down the sides. Keep the layer glossy without crushing the fruit.
- Repeat the layering process two more times with cake, cheesecake filling, and berries until the dish is full. Keep layers consistent for clean, tall stacking.
- Top the final layer with a generous ring of whipped cream dollops, extra mixed berries, and fresh mint leaves for color. Arrange the berries and mint so they sit clearly above the cream.
- Refrigerate the trifle for at least 1 hour before serving, or overnight to let flavors meld. Serve cold straight from the bowl for the best texture contrast.
