Red Velvet Whoopie Pies
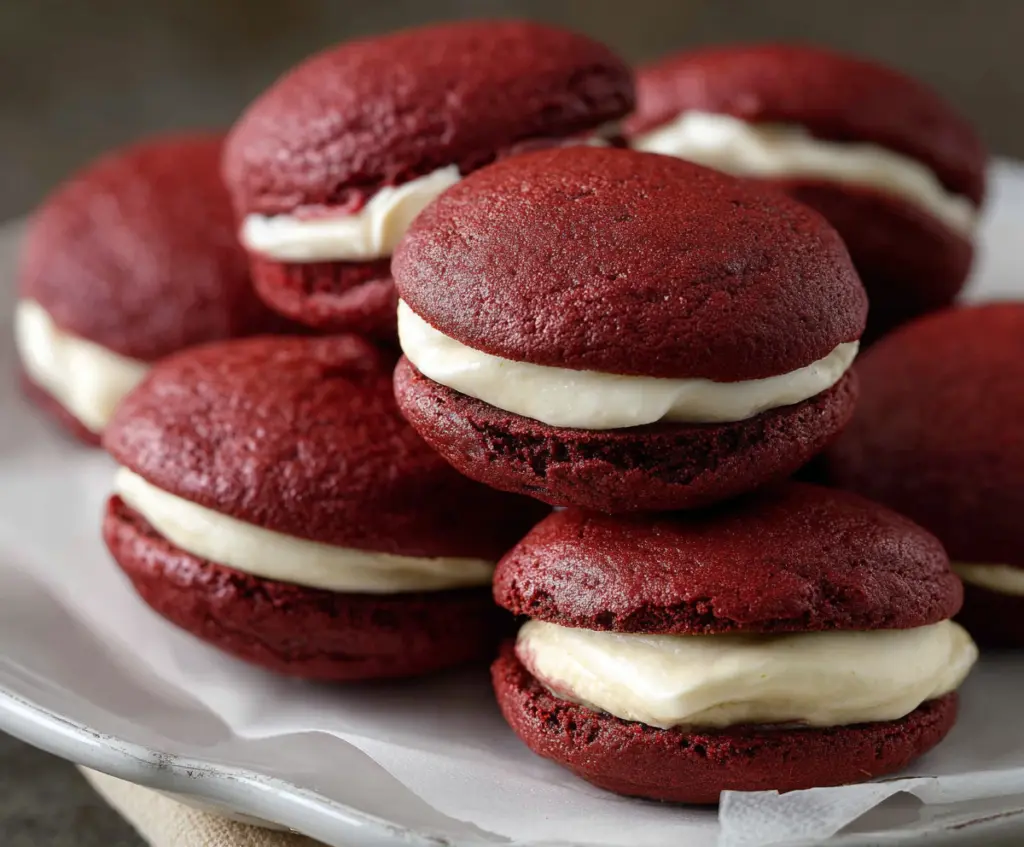
Red Velvet Whoopie Pies are a delightful treat that bring together soft, cake-like cookies with a sweet, creamy filling. Think of them as a fun, handheld dessert with that classic…
Tip: save now, cook later.Red Velvet Whoopie Pies are a delightful treat that bring together soft, cake-like cookies with a sweet, creamy filling. Think of them as a fun, handheld dessert with that classic red velvet flavor and a smooth, fluffy cream cheese frosting in the middle. They’re bright, festive, and just begging to be shared.
I love making these whoopie pies because they’re a perfect mix of tender and rich. The way the red velvet cookie part melts in your mouth, paired with the cool, creamy filling, always makes me smile. A little tip: chill them before serving so the filling stays nice and firm—it really makes a difference!
These are great for holidays, parties, or just a cozy afternoon snack with a cup of coffee or tea. I find that everyone, from kids to adults, can’t resist picking these up and going back for seconds. It’s like a little package of happy that you can hold in your hand.
Key Ingredients & Substitutions
All-Purpose Flour: This gives structure to the cakes. If you want a lighter touch, you can swap half for cake flour, which makes the whoopie pies softer.
Cocoa Powder: Unsweetened cocoa adds a subtle chocolate note. Dutch-processed cocoa works well too and gives a milder chocolate flavor.
Buttermilk: It adds tang and moisture while reacting with baking soda to help the cakes rise. No buttermilk? Use regular milk with 1 tablespoon lemon juice or vinegar added.
Red Food Coloring: This classic gives the red velvet its signature look. You can try natural alternatives like beet juice, but colors may be less vibrant.
Cream Cheese: The filling’s star! Use full-fat for best taste and texture. For a dairy-free option, try a vegan cream cheese substitute.
How Do You Get Soft, Evenly Shaped Whoopie Cakes?
The key is to mix ingredients just enough and bake at the right time.
- Beat butter and sugar until fluffy to trap air, which helps cakes rise.
- Mix in dry and wet ingredients alternately to keep batter smooth, but don’t overmix or it gets tough.
- Use a cookie scoop or tablespoon to drop uniform-sized dollops on baking sheets.
- Space them well—about 2 inches apart—to prevent spreading into one another.
- Bake just until edges feel firm and centers spring back gently. Overbaking dries them out.
- Let cakes cool on the sheet briefly before moving to wire racks to avoid breaking.
Patience in these steps makes for those soft, fluffy, perfectly rounded whoopie pie cakes that melt in your mouth!
Equipment You’ll Need
- Baking sheets – they give the cakes a flat surface to bake evenly without sticking.
- Parchment paper – stops the whoopie cakes from sticking and helps with easy cleanup.
- Electric mixer or stand mixer – makes beating butter, sugar, and cream cheese smooth and quick.
- Mixing bowls – you’ll need at least two for dry and wet ingredients to keep things organized.
- Cookie scoop or tablespoon – helps you portion the batter evenly, so cakes bake uniformly.
- Wire cooling rack – lets the cakes cool completely without getting soggy underneath.
- Spatula or piping bag – great for spreading or piping the cream cheese filling between the cakes neatly.
Flavor Variations & Add-Ins
- Try swapping some cocoa powder for instant espresso powder to add a subtle coffee flavor that pairs wonderfully with red velvet.
- Add a pinch of cinnamon or nutmeg to the cake batter for a warm, spicy twist, perfect for fall or holiday treats.
- Use mascarpone cheese instead of cream cheese in the filling for a richer, silkier texture and taste.
- Mix in finely chopped toasted pecans or walnuts into the filling for a crunchy surprise inside your soft whoopie pies.
How to Make Red Velvet Whoopie Pies?
Ingredients You’ll Need:
For the Red Velvet Cakes:
- 2 cups all-purpose flour
- 2 tablespoons unsweetened cocoa powder
- 1 teaspoon baking soda
- ½ teaspoon salt
- ½ cup unsalted butter, softened
- 1 cup granulated sugar
- 1 large egg
- 1 teaspoon vanilla extract
- 1 cup buttermilk
- 1 tablespoon red food coloring
- 1 teaspoon white vinegar
For the Cream Cheese Filling:
- 8 ounces cream cheese, softened
- ½ cup unsalted butter, softened
- 3 cups powdered sugar, sifted
- 1 teaspoon vanilla extract
How Much Time Will You Need?
This recipe takes about 15 minutes to prep, 10-12 minutes to bake, and about 30 minutes chilling time. So, plan on around an hour for the whole process, including cooling and assembling your delicious whoopie pies.
Step-by-Step Instructions:
1. Make the Red Velvet Cakes:
First, preheat your oven to 350°F (175°C) and line two baking sheets with parchment paper. In a medium bowl, whisk together the flour, cocoa powder, baking soda, and salt. Set this dry mix aside. In a large bowl, beat the softened butter and sugar using an electric mixer until the mixture is light and fluffy, which takes about 3 minutes. Next, add the egg and vanilla extract and mix until combined.
In a separate small bowl, mix the buttermilk, red food coloring, and white vinegar. Then, slowly add the dry ingredients and the buttermilk mixture to the butter mixture alternately, beginning and ending with the dry ingredients. Be careful to mix gently and only until combined.
Use a tablespoon or cookie scoop to drop the batter onto the baking sheets, leaving about 2 inches of space between each dollop. Aim for even, round shapes.
Bake your cakes for 10-12 minutes, or until they spring back gently when you press them. Let them cool on the baking sheets for 5 minutes, then transfer to a wire rack to cool completely.
2. Prepare the Cream Cheese Filling:
While your cakes cool, beat together the softened cream cheese and butter until smooth and creamy. Gradually add the powdered sugar and vanilla extract, starting on low speed to avoid a sugar cloud and then increasing to medium speed. Beat until the filling becomes fluffy and delightful.
3. Assemble and Chill Your Whoopie Pies:
Once the red velvet cakes are fully cooled, spread or pipe a generous dollop of cream cheese filling onto the flat side of one cake. Gently press another cake on top to form a sandwich. Repeat until all cakes are filled.
Place the whoopie pies in the refrigerator for at least 30 minutes to let the filling firm up nicely. Then, serve and enjoy your moist, tender Red Velvet Whoopie Pies with creamy filling!
Can I Use Frozen Red Velvet Cakes for Whoopie Pies?
Yes! Just make sure to fully thaw the cakes at room temperature before assembling to prevent condensation from making the filling soggy.
Can I Make the Filling Ahead of Time?
Absolutely. You can prepare the cream cheese filling a day in advance and keep it in an airtight container in the fridge. Give it a quick whip before assembling if it firms up too much.
How Should I Store Leftover Whoopie Pies?
Store them in an airtight container in the refrigerator for up to 4 days. Let them come to room temperature for about 15 minutes before enjoying for the best texture.
What Can I Substitute for Buttermilk?
If you don’t have buttermilk, mix 1 tablespoon of lemon juice or white vinegar into 1 cup of milk. Let it sit for 5 minutes, then use it as a buttermilk substitute in the recipe.
