Raspberry Crumble Cookies (Costco Copycat)
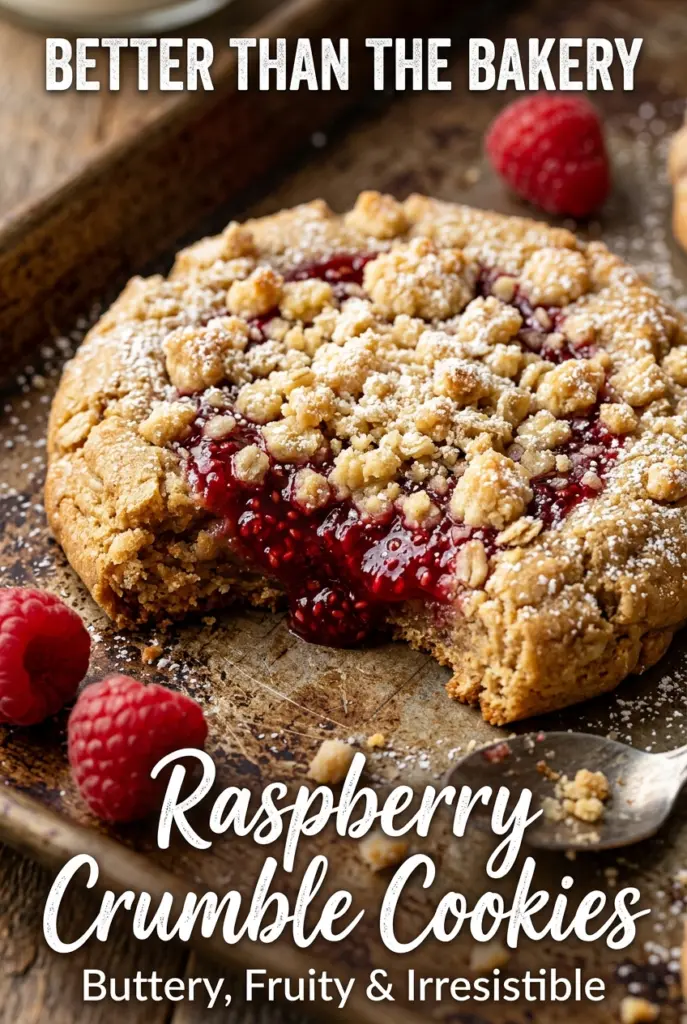
Soft, buttery cookie bases topped with tangy raspberry filling and a golden crumble have a way of disappearing faster than anything else on the tray. These Raspberry Crumble Cookies hit…
Tip: save now, cook later.Soft, buttery cookie bases topped with tangy raspberry filling and a golden crumble have a way of disappearing faster than anything else on the tray. These Raspberry Crumble Cookies hit that bakery-style sweet spot: tender in the middle, lightly crisp at the edges, and finished with just enough fruit to keep each bite bright instead of heavy. They look like the kind of cookie that took a whole afternoon, but the method stays straightforward and the results are worth every minute.
What makes this version work is balance. The cookie dough is sturdy enough to hold the filling without spreading into a flat mess, and the raspberry preserves get a little lemon juice stirred in so the center tastes fresh instead of one-note sweet. The crumble goes on cold and bakes into little golden pebbles that give you texture without turning dry or sandy. If you’ve ever had fruit-filled cookies leak, slump, or bake up dense, the order here matters just as much as the ingredients.
Below, I’ve broken down the small details that keep the centers neat, the topping crumbly, and the cookies soft for days. There’s also a simple glaze if you want that true bakery finish.
The filling stayed put, the crumble baked up crisp, and the cookies were still soft the next day. I added the lemon juice like you said and it made the raspberry taste pop instead of tasting like straight jam.
Save these Raspberry Crumble Cookies for when you want a Costco-style treat with soft centers, jammy raspberry filling, and a crisp crumb topping.
The Key to Keeping the Raspberry Center from Bleeding into the Dough
The biggest mistake with fruit-filled cookies is treating the filling like it can behave the same way as dough. It can’t. Raspberry preserves need a little structure around them, which is why these cookies get scooped, lightly flattened, and then indented before the filling goes in. That shallow well gives the jam somewhere to sit, so it bakes in the middle instead of running across the whole cookie sheet.
The other piece that matters is the crumble. If you overwork it, the topping turns into paste instead of scattered crumbs. Stop mixing as soon as you have pea-sized pieces and sandy bits clinging together. That mix bakes into a crisp, golden topping with some texture left in it.
- Butter — Softened butter gives the base that bakery-style tenderness. Cold butter will fight the sugar and leave the dough dense.
- Raspberry preserves — Preserves are thicker than jam, which helps them hold their shape in the cookie. If yours is loose, simmer it for a minute or two to tighten it before filling.
- Lemon juice — This wakes up the raspberry flavor. Even a small amount keeps the filling from tasting flat.
- Cold butter for the crumble — Keep it cold so the topping stays crumbly. Room-temperature butter melts into the flour too quickly and loses that bakery texture.
- All-purpose flour — This does the structural work in both the dough and the crumble. There isn’t a great substitute if you want the same sturdy, soft cookie.
The 20 Minutes That Matter Most
Creaming the Base
Beat the butter with both sugars until the mixture looks pale and fluffy, not greasy. That step adds air and helps the cookies bake up tender instead of heavy. Add the eggs one at a time and mix in the vanilla until the dough looks smooth and glossy. If the butter is too warm, the dough can look soupy and the cookies will spread more than they should.
Mixing the Dough Without Toughening It
Add the dry ingredients gradually and stop as soon as the flour disappears. Overmixing at this point builds too much structure and the cookies lose that soft bakery bite. The dough should be thick enough to scoop cleanly. If it feels sticky, chill it for 15 minutes instead of adding extra flour.
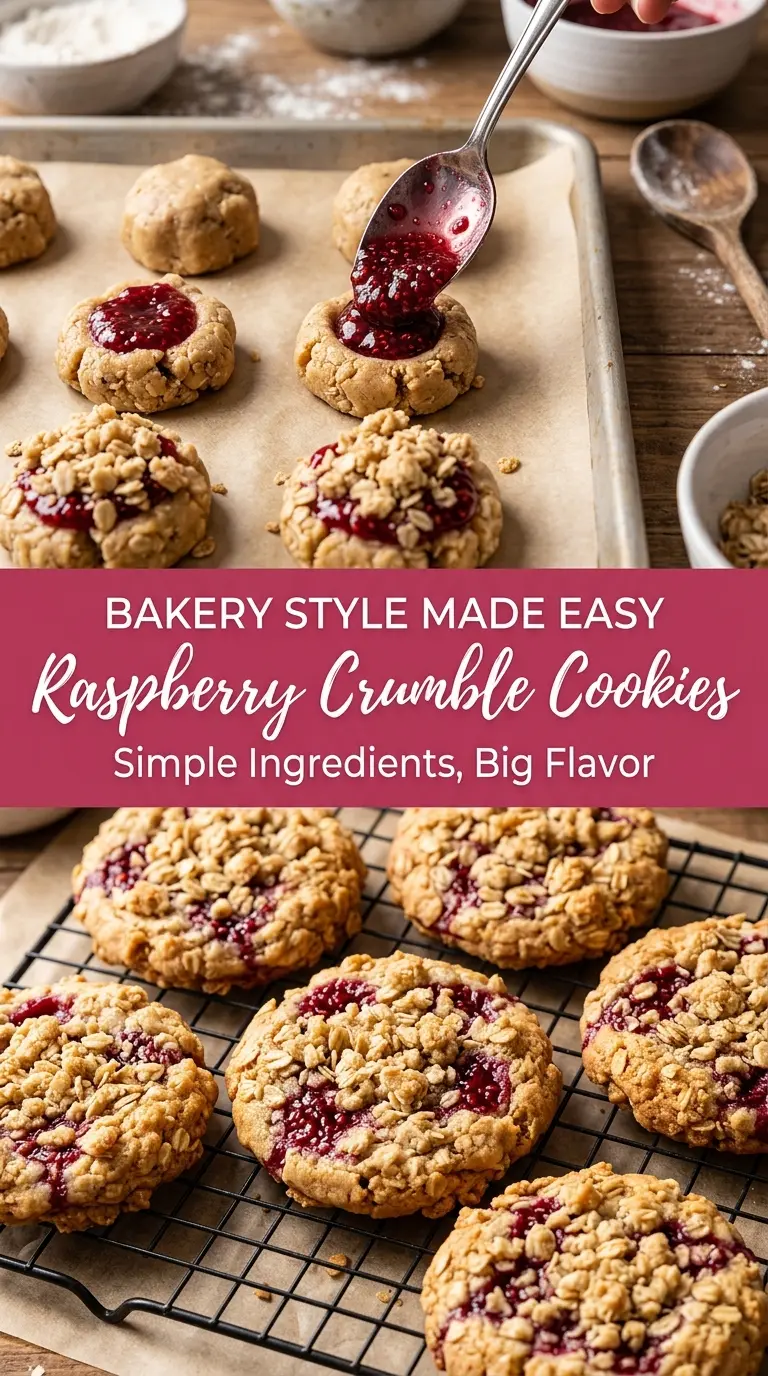
Filling and Topping the Cookies
Scoop large portions onto the baking sheet, flatten them just slightly, and press a shallow center into each one. Spoon in a small amount of raspberry filling; too much will bubble over and make the crumble slide off. Scatter the crumble on top without packing it down. You want little ridges and crumbs that bake into texture, not a pressed layer.
Baking Until the Edges Set
Bake just until the edges are lightly golden and the centers look set but still soft. The cookies keep cooking on the pan after they come out, so pulling them too late is how you end up with dry results. Let them cool completely before adding glaze, or the drizzle will melt right off.
Three Ways to Make These Cookies Work for Your Kitchen
Glazed Finish
Whisk the powdered sugar with just enough milk to make a thick drizzle, then let it fall in thin ribbons over fully cooled cookies. The glaze adds a bakery look and a little extra sweetness, but it also softens the crumble slightly as it sits.
Dairy-Free Version
Use a good plant-based butter that comes in sticks, not a tub spread. Tub-style substitutes often contain more water and can make the cookies spread too much. The texture will be slightly less rich, but the filling and crumble still carry the raspberry-cookie flavor well.
Extra-Jammy Filling
If you want a more pronounced fruit center, stir in a spoonful of seedless raspberry jam with the preserves. The filling will taste brighter and more fruit-forward, but it may spread a touch more, so keep the portion small.
Storage and Reheating
- Refrigerator: Store in an airtight container for up to 4 days. The crumble softens a little, but the cookies stay tender.
- Freezer: Freeze baked cookies in a single layer, then transfer to a container for up to 2 months. Thaw at room temperature so the filling doesn’t weep.
- Reheating: Warm a cookie for 8 to 10 seconds in the microwave if you want the centers soft again. Longer than that, and the crumble loses its texture.
Answers to the Questions Worth Asking

Raspberry Crumble Cookies (Costco Copycat)
Ingredients
Equipment
Method
- Preheat the oven to 350°F (175°C). Line baking sheets with parchment paper so the cookies release cleanly.
- Cream the softened unsalted butter, granulated sugar, and brown sugar until fluffy. Mix in a larger bowl until the mixture looks lighter in color and texture.
- Beat in the eggs and vanilla extract until smooth. Stop when the batter is evenly combined without streaks.
- Mix the all-purpose flour, baking powder, and salt in a separate bowl. Whisk to distribute the leavening and salt evenly.
- Gradually add the dry ingredients to the wet ingredients. Mix just until no dry flour remains and a soft dough forms.
- Scoop large cookie portions onto the prepared baking sheets. Flatten slightly with your hand so each cookie can hold a filling well.
- Mix the raspberry preserves and lemon juice. Stir until the lemon juice is incorporated and the mixture looks glossy.
- Create a shallow indentation in each cookie. Press gently so the center holds the filling without cracking the edges.
- Spoon the raspberry filling into the center of each cookie. Add enough to fill the indentation but avoid overflowing the sides.
- Combine the crumble topping ingredients with a fork until crumbly. The mixture should look like small uneven crumbs with some buttery clumps.
- Sprinkle the crumble topping over each cookie. Cover the top generously so it bakes into a golden crust.
- Bake at 350°F (175°C) for 14–16 minutes until lightly golden. The edges should look set while the centers remain soft.
- Cool completely on the baking sheets or a rack. Letting them cool fully helps the raspberry filling thicken so the crumb stays tender.
- Drizzle with glaze if desired. Stir powdered sugar with milk until smooth, then drizzle in thin lines after cooling.
