

No-Bake Pilgrim Hat Cookies
The first hat looks a little lopsided if the peanut butter cup lands off-center, and that’s easy to do when you’re moving quickly. I line up all the cookies first,…
Tip: save now, cook later.The first hat looks a little lopsided if the peanut butter cup lands off-center, and that’s easy to do when you’re moving quickly. I line up all the cookies first, then build each one in place so I can see the brim and crown together. These No-Bake Pilgrim Hat Cookies use fudge-striped shortbread, chocolate frosting, mini peanut butter cups, and yellow icing—no oven or separate candy-making step needed.
The frosting works as the edible glue between the cookie and the peanut butter cup. A small, even dab gives the cup enough grip without squeezing out around the edge, so the yellow buckle stays the detail your eye goes to. The cookies are ready as soon as the small rectangles are drawn, which makes this a fun project when you want a batch of themed treats without turning on the oven.

Kitchen Note
The frosting is doing real work here, but a thick mound can squish out when you press the cup down. Keep the dab modest and spread it across the flat bottom so the cup sits neatly on the cookie.
Save these No-Bake Pilgrim Hat Cookies for a no-oven holiday treat, with chocolate cup crowns and bright yellow buckle details.
Why the Stripes Belong Under the Brim
These cookies already have a built-in design, so their orientation changes the look of the finished hat. Set each cookie stripe-side down, as the instructions specify, and the plain side faces up to become the visible brim. The peanut butter cup then reads as the crown, while the yellow rectangle gives it the familiar buckle. Flip the cookie the other way and the chocolate stripes become the top surface, competing with the buckle instead of framing it.
It’s a tiny choice, but it helps the parts look intentional rather than like candy stacked on a cookie. Work on a clean, flat surface, where the cookies won’t wobble as you center the cups. I also like arranging all the cookies before opening the frosting; once the parts are within reach, you can move through the batch without losing track of which side should face up. Each finished hat has the same simple shape, and the cookie’s plain surface gives the yellow detail a clear place to stand out.
The Four Parts That Turn Shortbread Into a Pilgrim Hat
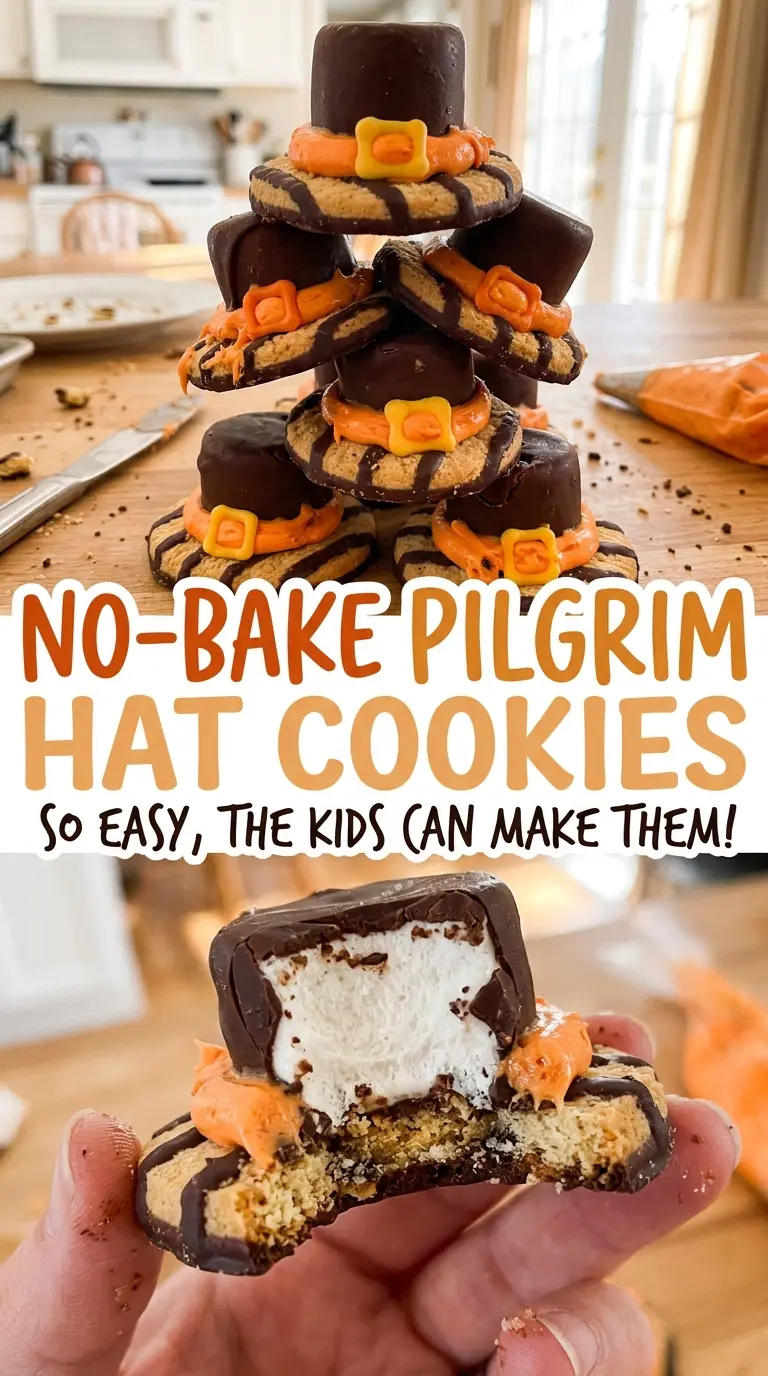
- Fudge-striped shortbread cookies — The round cookie gives each hat its brim, and the stripes make the underside easy to identify while you arrange them. Choose cookies that are intact and close in size so the hats look consistent. Another brand of fudge-striped shortbread is the closest swap; a different cookie type changes the brim’s size and appearance.
- Chocolate frosting — This is the edible adhesive, not just decoration. A smooth, spreadable frosting is easiest to apply to the flat bottom of each cup; a different brand of chocolate frosting works, but a stiff or crusted frosting is harder to spread in a thin layer. There isn’t another ingredient in this short list that fills the same role.
- Mini peanut butter cups — Their small, rounded shape makes the crown of the hat. Unwrap each one before assembly and check that the flat bottom is available for the frosting. A different brand of mini peanut butter cups is the most direct swap; full-size cups are too large for the same proportions.
- Yellow decorating icing — The tube lets you draw a defined buckle without mixing or spreading a separate topping. Use a fresh tube that flows in a steady line, and keep the detail small so it reads as a buckle on the cup. Another brand of yellow decorating icing will work; there’s no close match among the other listed ingredients if you leave it out.
Assembling Each Hat Without Losing the Buckle Detail
Set Up the Cookie Brims
Arrange the cookies on a clean work surface with the striped side facing down. Give yourself enough room to work around each one without bumping the others. The cookies are the base of every hat, so start with them all oriented the same way. If one is broken, set it aside rather than trying to balance a cup on an uneven edge.
Attach the Peanut Butter Cup Crowns
Spread about 1/2 teaspoon of chocolate frosting on the flat bottom of each unwrapped peanut butter cup. Press the cup, frosting-side down, onto the center of a cookie. Look down from above to check that there’s a similar amount of brim showing on every side. If the cup slides, lift it and reposition it before moving on rather than leaving the hat visibly off-center.
Draw the Yellow Buckles
Use the yellow decorating icing to draw a small rectangle on the front of each peanut butter cup. Turn each hat so the side facing you is easy to reach, then keep the rectangle compact enough to fit on the curved candy surface. A steady, unhurried line gives the buckle a cleaner outline than trying to draw it in one rushed motion. The cookies are ready once every cup has its yellow detail.
Small Changes to the Buckles, Without Changing the Shopping List
A Fine-Line Buckle
Draw the small rectangle with a narrow line of yellow icing instead of making the outline thick. The buckle looks delicate and leaves more of the chocolate cup visible. Keep the same rectangle shape so it still reads clearly on the curved front.
A Bolder Buckle Outline
Trace the small rectangle a second time with the yellow decorating icing to make the outline stand out more. This adds a little visual weight without introducing another ingredient. Keep the outline close to the front of the cup so it doesn’t wrap around the sides.
Storage and Reheating
- Refrigerator: Store the cookies in an airtight container at cool room temperature for up to 3 days; refrigeration can make the cookie surface lose its crisp texture.
- Freezer: I don’t recommend freezing the assembled hats. The icing detail can smear or crack as they thaw, and moisture can soften the cookies.
- Reheating: These are served at room temperature, so don’t warm them. Heat can soften the frosting and make the peanut butter cups messy.
Questions That Come Up While Making Pilgrim Hat Cookies
No-Bake Pilgrim Hat Cookies
Ingredients
Method
- Arrange the cookies stripe-side down on a clean work surface.
- Spread about 1/2 teaspoon chocolate frosting on the flat bottom of each peanut butter cup.
- Press each cup frosting-side down onto the center of a cookie.
- Use the yellow decorating icing to draw a small rectangle on the front of each peanut butter cup for the buckle.