Winter Vanilla Snowflake Cake
Winter Vanilla Snowflake Cake is a beautiful and light dessert that feels just right for chilly days. This cake is soft and fluffy with a gentle vanilla flavor, topped with…
Tip: save now, cook later.Winter Vanilla Snowflake Cake is a beautiful and light dessert that feels just right for chilly days. This cake is soft and fluffy with a gentle vanilla flavor, topped with delicate snowflake decorations that make it look like a little winter wonderland on your plate.
I love making this cake when friends come over because everyone always smiles when they see those pretty snowflakes. It’s simple enough to bake, but the special touch of the snowflake decorations makes it feel festive without too much fuss. I usually use a vanilla buttercream that’s sweet but not too rich, which balances perfectly with the soft cake layers.
When I serve this cake, I like to pair it with a warm cup of tea or hot cocoa to keep the cozy feeling going. It’s one of those desserts that feels both fancy and comforting, great for sharing stories and making memories on a cold winter afternoon. Plus, it’s fun to see if anyone notices the little edible snowflakes before they take their first bite!
Key Ingredients & Substitutions
All-purpose flour: This gives the cake structure. For a lighter texture, you can swap half the flour for cake flour if you like.
Butter: Use unsalted and softened butter for both cake and frosting—it creates the best creaminess. If dairy is an issue, try a plant-based butter substitute but check for firmness.
Vanilla extract: Pure vanilla is key for that classic flavor. If you don’t have vanilla, almond or maple extract can add a tasty twist.
Milk: Whole milk keeps the cake moist. You can use buttermilk or a dairy-free alternative like oat milk for a different texture and flavor.
Powdered sugar: Important for sweet, smooth buttercream frosting. Sift it well to avoid lumps.
Gel food coloring: Gel colors are best for vibrant frosting without thinning it out. Water-based liquid colors can make the frosting runny.
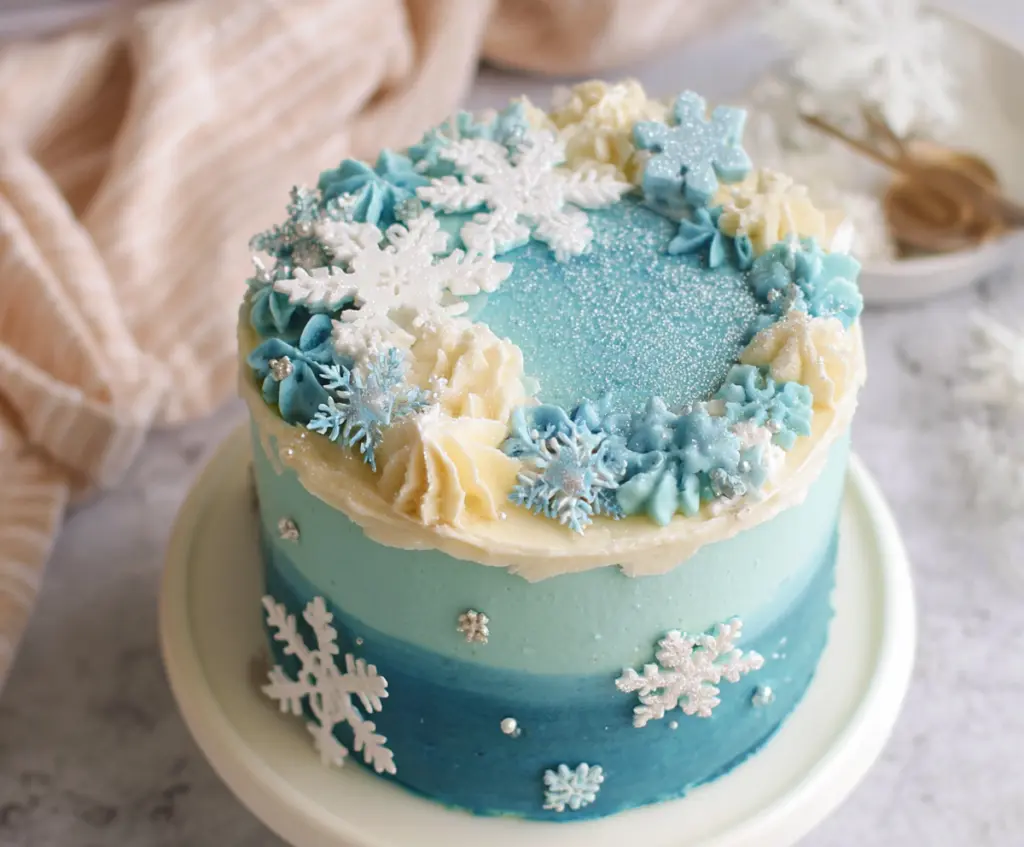
How Do You Achieve Smooth Ombre Frosting & Beautiful Snowflake Decoration?
Creating a smooth ombré effect means blending three frosting tones carefully.
- Apply the darkest frosting on the bottom third of the cake first, spreading evenly with an offset spatula.
- Next, add the medium blue in the middle, slightly overlapping the dark blue and gently smooth the joining line up and down to blend.
- Finish with white on top, blending downward into the medium blue for a soft gradient.
- Chill the cake briefly to firm up the frosting before piping decorations.
For snowflake piped shapes or decorations:
- If using royal icing snowflakes, make sure they’re completely dry before placing on the cake.
- When piping buttercream, use a clean star or snowflake tip and steady pressure for defined shapes.
- Delicately place edible silver pearls and glitter last for that sparkling winter touch.
Taking your time with frosting blending and decorating will really make this cake look magical and neat.
Equipment You’ll Need
- Three 6-inch round cake pans – perfect for baking even, stackable layers for a tall cake.
- Electric mixer – helps you beat butter and sugar until fluffy and makes smooth frosting.
- Offset spatula – great for spreading and smoothing frosting evenly around the cake sides.
- Mixing bowls – you’ll need a few for batter and dividing/coloring the frosting.
- Piping bags and star tips – for piping the pretty rosettes and snowflake shapes on top.
- Cooling racks – so your cake layers cool down flat and don’t get soggy.
Flavor Variations & Add-Ins
- Add a teaspoon of almond extract with the vanilla for a nutty twist that pairs well with the soft cake.
- Swap some of the vanilla frosting for cream cheese frosting to add a subtle tang and creaminess.
- Fold in fresh raspberries or blueberries between layers for a fruity surprise and color contrast.
- Sprinkle crushed peppermint candy on top for a minty touch perfect for holiday celebrations.
Winter Vanilla Snowflake Cake
Ingredients You’ll Need:
For the Vanilla Cake:
- 2 ¾ cups (345g) all-purpose flour
- 2 ½ tsp baking powder
- ½ tsp salt
- 1 cup (225g) unsalted butter, softened
- 1 ¾ cups (350g) granulated sugar
- 4 large eggs
- 1 tbsp pure vanilla extract
- 1 cup (240ml) whole milk
For the Vanilla Buttercream Frosting:
- 1 ½ cups (340g) unsalted butter, softened
- 5 cups (600g) powdered sugar, sifted
- 2 tsp pure vanilla extract
- 3-4 tbsp heavy cream or whole milk
- Pinch of salt
For Decoration:
- Blue and white gel food coloring
- Edible silver glitter
- Edible snowflake decorations or piped royal icing snowflakes
- Silver edible pearls or dragees
How Much Time Will You Need?
This cake takes about 20 minutes to prepare the batter and frosting, 25-30 minutes to bake, and about 1 hour to assemble and decorate. Allow time for the cake layers to cool completely before frosting, plus chilling time for the crumb coat and finished cake—overall, roughly 2 to 3 hours.
Step-by-Step Instructions:
1. Prepare the Cake Batter:
Preheat your oven to 350°F (175°C). Grease and flour three 6-inch round cake pans. In a medium bowl, sift together the flour, baking powder, and salt.
In a large mixing bowl, beat the softened butter and sugar with an electric mixer on medium speed until light and fluffy, about 4-5 minutes. Add the eggs one at a time, beating well after each. Stir in the vanilla extract.
Slowly add the dry ingredients and milk alternately to the butter mixture, starting and ending with the dry ingredients. Mix just until combined, being careful not to overmix.
2. Bake the Cakes:
Divide the batter evenly among the prepared pans. Bake for 25-30 minutes, or until a toothpick inserted into the center comes out clean. Let the cakes cool in the pans for 10 minutes, then turn them out onto wire racks to cool completely.
3. Make the Buttercream Frosting:
Beat the softened butter in a large bowl until creamy. Gradually add powdered sugar one cup at a time, mixing well after each addition. Stir in vanilla extract, salt, and 3 tablespoons of cream or milk. Beat for 3-4 minutes until light and fluffy. Add extra cream or milk if needed for spreading consistency.
4. Color the Frosting:
Divide the frosting into three parts. Leave one portion white, tint one portion light blue with gel food coloring, and color the last portion a deeper aqua blue.
5. Assemble the Cake:
Place one cake layer on your serving plate or cake stand. Spread a layer of vanilla buttercream evenly on top. Repeat with the remaining layers. Spread a thin crumb coat of white frosting all around the cake, then chill for 20 minutes to set.
6. Decorate the Cake:
Frost the bottom third of the cake with the deep blue frosting, the middle third with the light blue, and the top third with the white frosting. Blend the edges carefully for a smooth ombré effect.
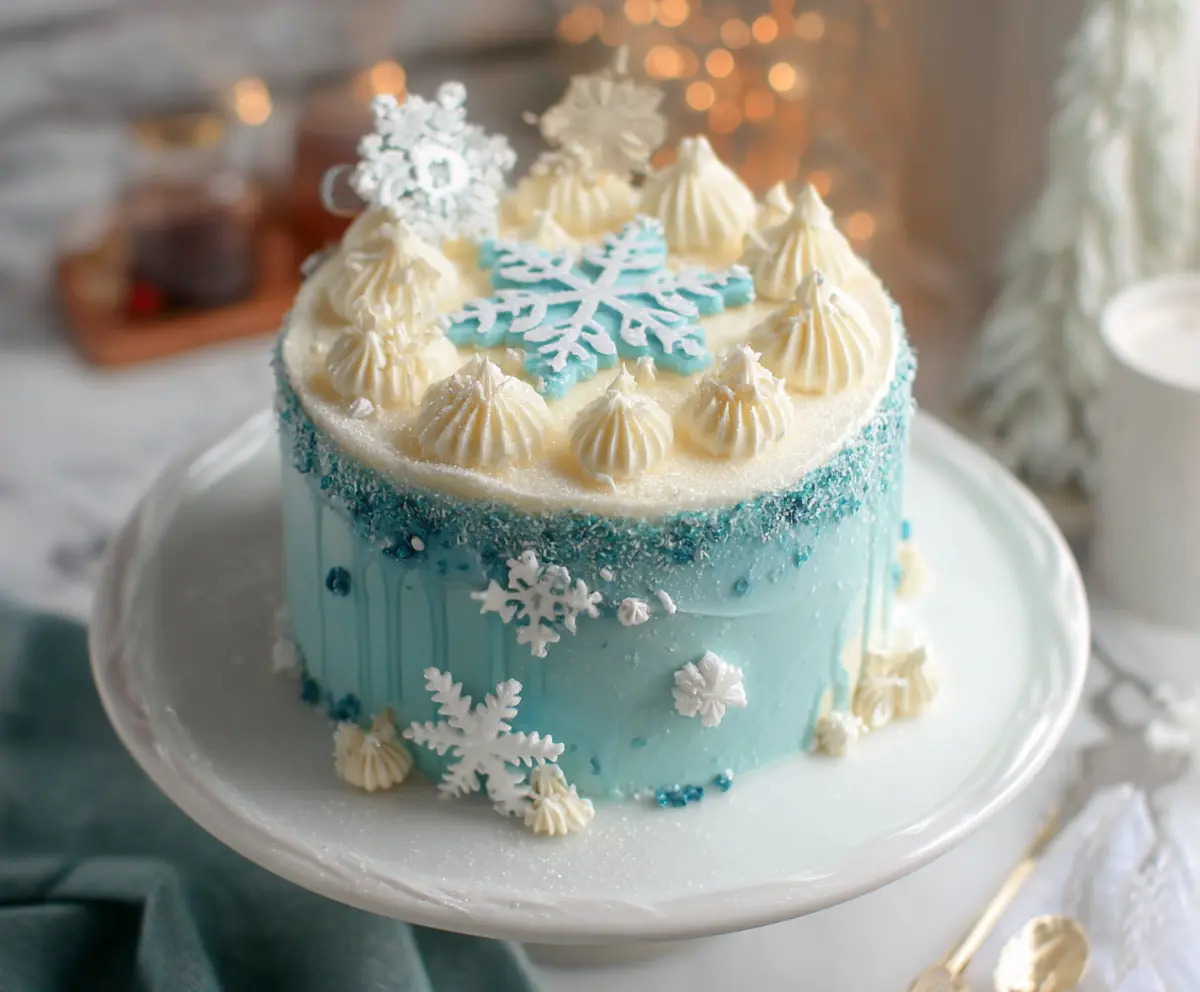
Using a piping bag fitted with a star tip, pipe rosettes and stars around the cake’s top edge, alternating white, light blue, and blue frosting.
Decorate the sides and top with edible white snowflake decorations and silver edible pearls. Finally, dust the center top of the cake with edible silver glitter for a sparkling snowy effect.
Chill the cake briefly to set the decorations before serving.
Can I Use Frozen Cake Layers for This Recipe?
Yes, you can! Just make sure the cake layers are fully thawed in the fridge overnight and come to room temperature before frosting to avoid melting your buttercream.
How Should I Store Leftover Cake?
Store leftover cake tightly covered in the fridge for up to 4 days. Let it come to room temperature before serving for the best texture and flavor.
Can I Substitute Milk in the Cake Batter?
Absolutely! You can use buttermilk, almond milk, or oat milk instead of whole milk. Just keep in mind that buttermilk will add a slight tang, while plant-based milks may slightly change the flavor.
What’s the Best Way to Pipe Snowflakes and Rosettes?
Use a piping bag fitted with small to medium star tips and practice steady, even pressure. If you’re new to piping, try practicing on parchment paper before decorating the cake.
