Monster Cookies
Monster Cookies are a fun and hearty treat loaded with oats, peanut butter, chocolate chips, and colorful M&Ms. They’re chewy, a little crunchy, and packed with so much good stuff…
Tip: save now, cook later.Monster Cookies are a fun and hearty treat loaded with oats, peanut butter, chocolate chips, and colorful M&Ms. They’re chewy, a little crunchy, and packed with so much good stuff that every bite feels like a little celebration. These cookies stand out because they’re not just sweet—they’ve got texture and a perfect mix of flavors that make them a favorite anytime.
I love making Monster Cookies whenever I want something that feels both nostalgic and exciting. There’s something special about mixing all those ingredients in one bowl and watching the magic happen in the oven. I usually sneak in a few more chocolate chips on top before baking because, well, you can never have too many. These cookies always bring out smiles, no matter who I share them with.
My favorite way to enjoy Monster Cookies is with a cold glass of milk or a cup of coffee in the afternoon. They’re sturdy enough to hold together but soft enough to melt in your mouth, making them perfect for a snack or even a simple dessert. If you’re ever looking for a cookie that’s a little different and always hits the spot, these are the ones to try.
Key Ingredients & Substitutions
Peanut Butter: This gives monster cookies their rich, nutty flavor and chewy texture. If you have a peanut allergy, try almond or sunflower seed butter instead. Just keep it creamy for the best results.
Rolled Oats: These add a hearty, chewy bite. Quick oats can be used but the texture will change slightly. I like old-fashioned oats for that perfect chew.
Chocolate Chips: Mini chips spread evenly throughout every bite. You can swap for dairy-free or vegan chips if needed. Adding white chocolate chips is also a fun twist!
Butter and Sugars: Both butter and sugars (granulated and brown) balance moisture, sweetness, and chewiness. Brown sugar adds a little chewy softness and deeper flavor. If you want less sugar, reduce granulated sugar but expect a slight texture change.
Food Coloring (Optional): Use gel-based coloring for vibrant colors without changing dough texture. If you skip coloring, the cookies will be the classic golden shade.
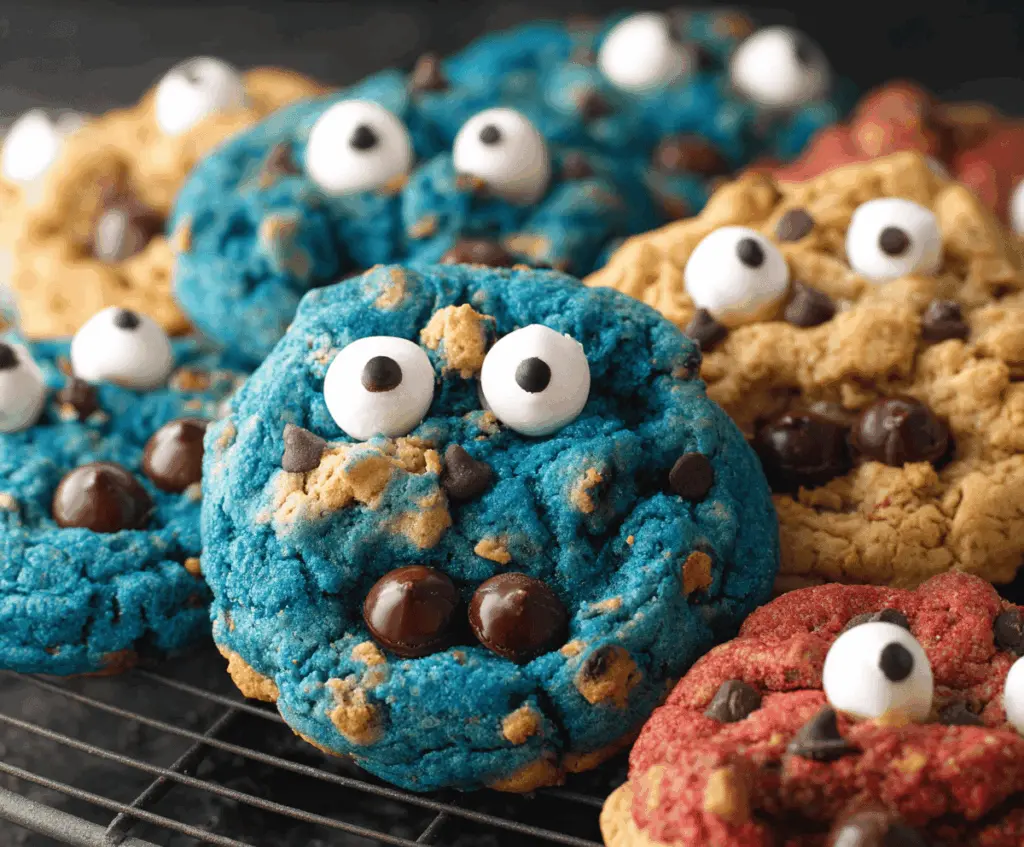
How Do You Make Perfect Monster Faces on Cookies?
Putting faces on cookies is what makes these monster cookies so much fun. Here’s how to do it easily:
- After scooping the cookie dough onto the baking sheet, gently press candy eyeballs into the top of each cookie before baking.
- Add mini chocolate chips nearby for pupils, eyebrows, or other facial details.
- Use two larger chocolate chips just below the eyes to form a “mouth” or “teeth.”
- Press all decorations lightly so they stick but don’t sink too deep as the cookies bake and spread.
- Bake right after decorating to keep the shapes intact.
This way, when the cookies bake, the faces stay cute and clear. It’s a simple step that brings a lot of charm to the cookies, perfect for parties or Halloween treats.
Equipment You’ll Need
- Mixing bowls – a large one for the dough and a smaller one if you’re dividing and coloring the dough.
- Electric mixer or hand mixer – makes creaming butter and sugars quick and easy.
- Measuring cups and spoons – for accurate measurements, especially with baking soda and salt.
- Spoon or cookie scoop – to portion dough evenly and keep cookie sizes consistent.
- Baking sheets – sturdy sheets that distribute heat evenly help cookies bake just right.
- Parchment paper or silicone baking mats – prevent sticking and make cleanup easier.
- Cooling racks – let cookies cool completely without getting soggy underneath.
Flavor Variations & Add-Ins
- Swap peanut butter for almond or cashew butter to change the nutty profile and keep it allergy-friendly.
- Add chopped nuts like walnuts or pecans for extra crunch and a toasty flavor.
- Mix in dried cranberries or raisins for a chewy, fruity surprise.
- Use white chocolate chips or butterscotch chips instead of or in addition to regular chocolate chips for a sweeter twist.
How to Make Monster Cookies (with Fun Monster Faces)?
Ingredients You’ll Need:
Main Ingredients:
- 1 cup unsalted butter, softened
- 1 cup creamy peanut butter
- 1 cup granulated sugar
- 1 cup packed brown sugar
- 2 large eggs
- 1 tsp vanilla extract
- 2 1/2 cups all-purpose flour
- 1 tsp baking soda
- 1/2 tsp salt
- 3 cups old-fashioned rolled oats
- 1 1/2 cups mini chocolate chips
For Decorating:
- Gel food coloring (blue and red, optional for colorful cookies)
- Candy eyeballs for decorating
- Extra mini chocolate chips and large chocolate chips for faces
How Much Time Will You Need?
This recipe takes about 15 minutes to prepare, plus 10-12 minutes to bake each batch. Allow cooling time of about 10 minutes. Overall, you should allocate roughly 30-40 minutes to complete the cookies from start to finish.
Step-by-Step Instructions:
1. Preheat Oven and Prepare Pans
Set your oven to 350°F (175°C). Line baking sheets with parchment paper or silicone mats to prevent sticking and make cleanup easy.
2. Mix Wet Ingredients
In a large bowl, cream together the softened butter, peanut butter, granulated sugar, and brown sugar until the mixture is light and fluffy. Add the eggs one at a time, mixing well after each addition. Stir in the vanilla extract for flavor.
3. Mix Dry Ingredients
In a separate bowl, whisk together the all-purpose flour, baking soda, and salt to ensure even distribution of leavening and seasoning.
4. Combine Wet and Dry Ingredients
Gradually add the dry ingredients to the wet ingredients, mixing until just combined. Then fold in the rolled oats and mini chocolate chips for that classic Monster Cookie texture and taste.
5. Optional: Color Your Dough
If you want fun, colorful cookies, divide the dough into portions (for example, three equal parts). Add a few drops of gel food coloring (blue to one portion, red to another) and gently mix until the color is fully blended.
6. Form Cookies
Using a spoon or cookie scoop, place about 2 tablespoons of dough onto the prepared baking sheets. Space them about 2 inches apart to allow for spreading.
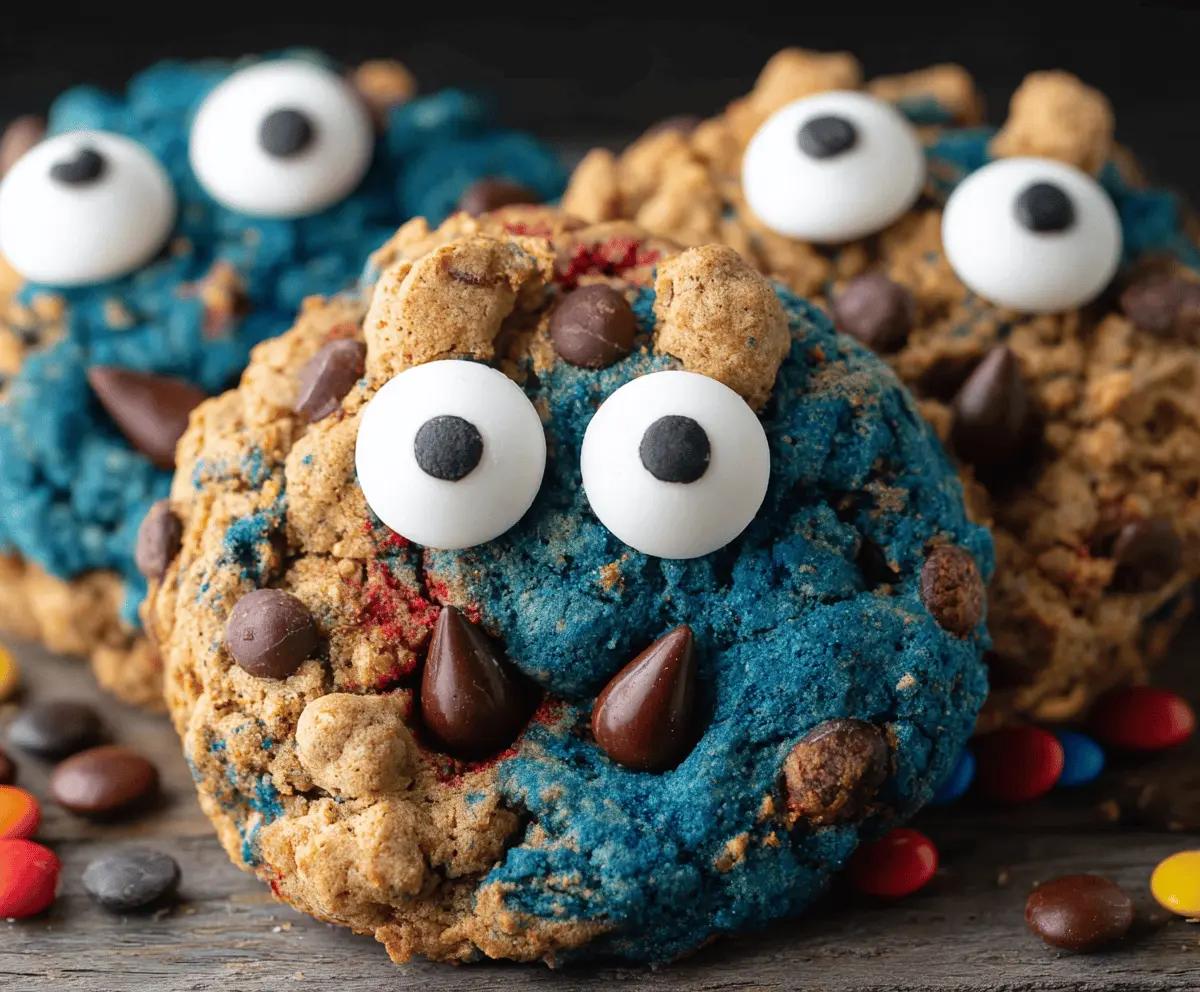
7. Add Monster Faces
Before baking, press candy eyeballs into the dough to create eyes. Use mini chocolate chips as pupils or eyebrows and place two large chocolate chips near the bottom to resemble a mouth with teeth. Personalize each cookie to look like a silly monster!
8. Bake the Cookies
Place the baking sheets in your preheated oven. Bake for about 10 to 12 minutes, or until the edges are set and slightly golden. The cookies will still be soft when warm but will firm up as they cool.
9. Cool and Serve
Allow the cookies to cool on the baking sheet for about 5 minutes. Then transfer to wire racks to cool completely. Enjoy your chewy, fun, and festive Monster Cookies with friends and family!
Can I Use Natural Peanut Butter in Monster Cookies?
Yes! Just make sure it’s well stirred and creamy. Natural peanut butter can make the dough a bit softer, so you might need to chill it slightly before scooping.
How Should I Store Leftover Monster Cookies?
Store them in an airtight container at room temperature for up to 5 days. For longer storage, freeze the cookies in a sealed container for up to 3 months—just thaw at room temperature before enjoying.
Can I Make the Dough Ahead of Time?
Absolutely! Prepare the dough and refrigerate it for up to 24 hours before baking. This can actually help deepen the flavors and improve texture.
What Can I Substitute for Candy Eyeballs?
If you don’t have candy eyeballs, use mini chocolate chips or make eyes with white frosting and a small dot of chocolate. Just get creative with what you have on hand!