Halloween Pumpkin Patch Brownies
Halloween Pumpkin Patch Brownies are a fun and festive treat that's perfect for celebrating the spooky season! These brownies are rich and chocolatey with a soft, fudgy texture, topped with…
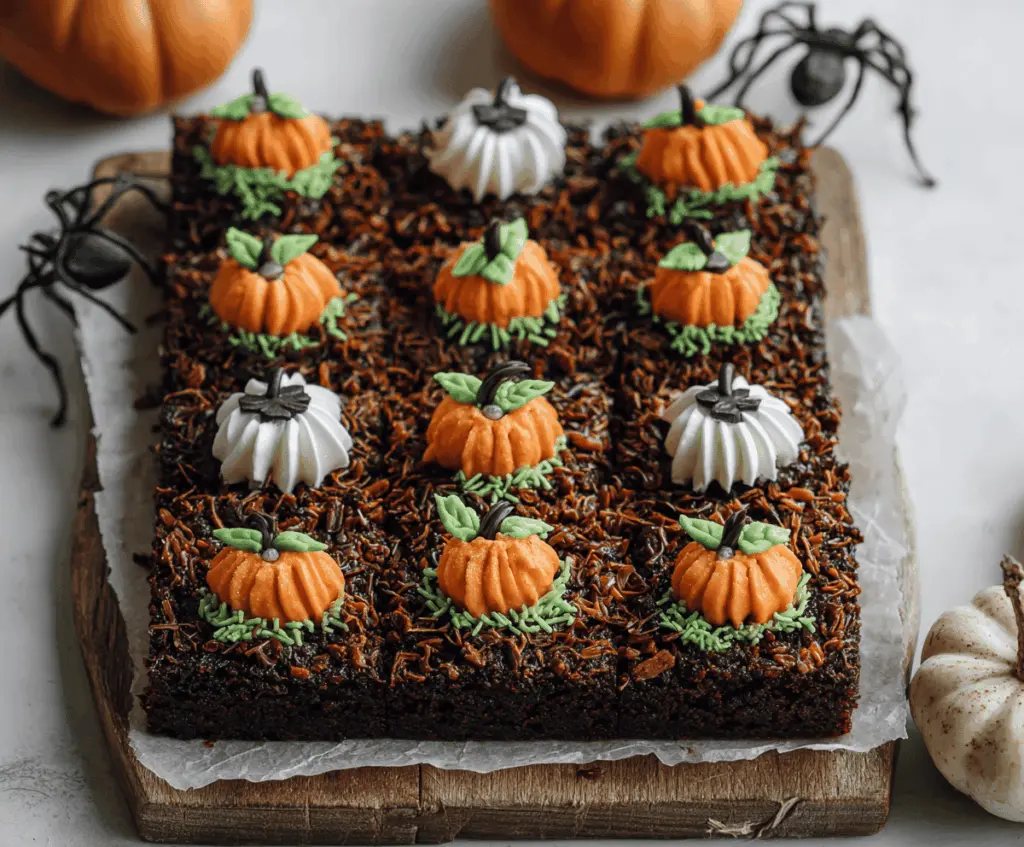
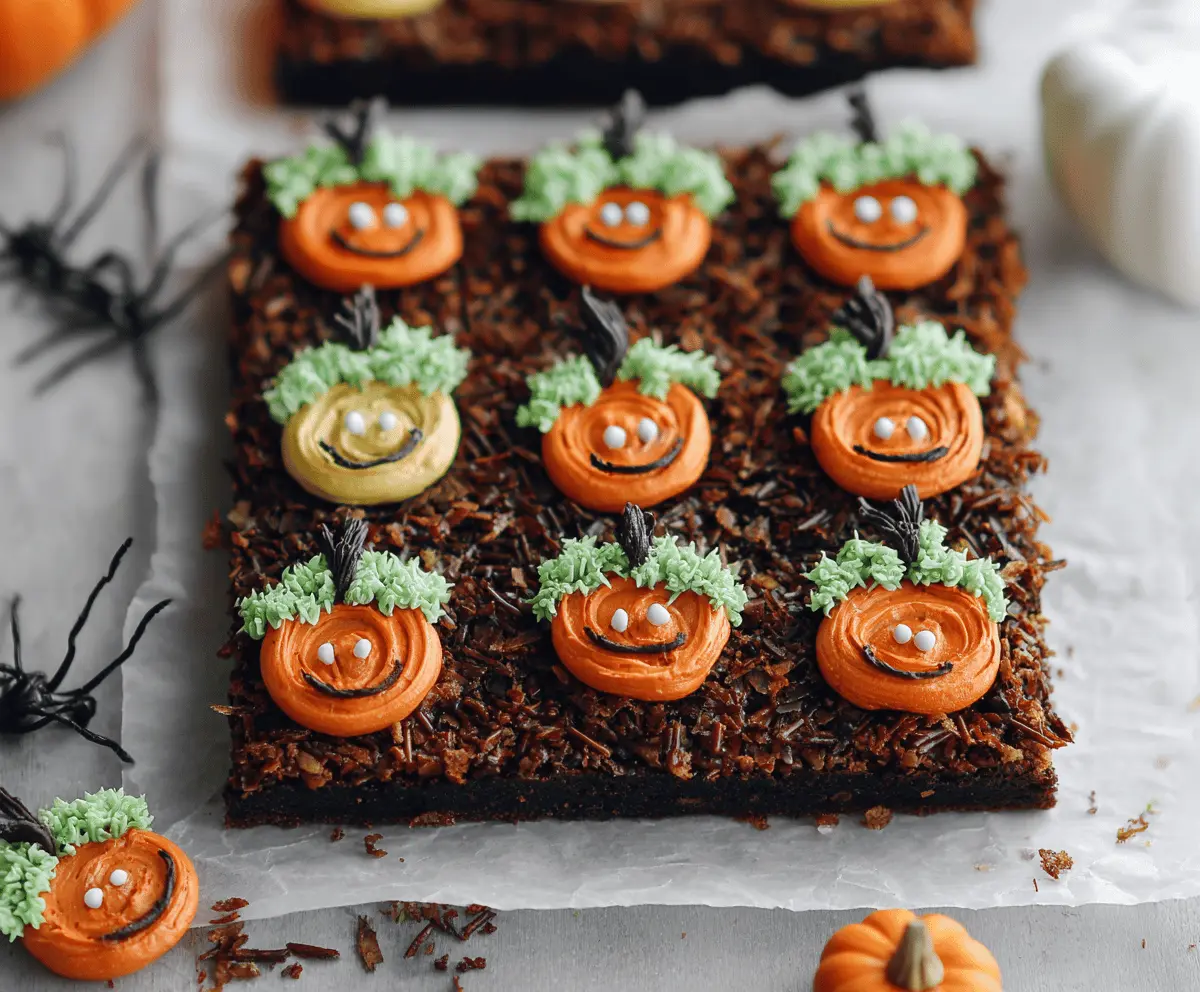
Tip: save now, cook later.Halloween Pumpkin Patch Brownies are a fun and festive treat that’s perfect for celebrating the spooky season! These brownies are rich and chocolatey with a soft, fudgy texture, topped with little pumpkin-shaped decorations that bring a playful touch straight from a pumpkin patch. The combination of chocolate and pumpkin-themed fun makes these brownies a hit at any Halloween party or cozy night in.
I love making these brownies because they add a bit of whimsy to the usual chocolate treat. It’s such a simple way to bring that Halloween spirit into the kitchen, and kids especially go crazy for the pumpkin decorations. I usually put on some spooky music and enjoy watching everyone’s faces light up when they see these cute little pumpkins on top. It feels like a little celebration with every bite!
My favorite way to serve these brownies is fresh and slightly warm with a glass of cold milk or a cup of warm apple cider. They’re great for sharing with friends and family, and I’ve found that they’re perfect for packing into lunchboxes during October too. If you’re looking for a fun way to add a bit of fall magic to your baking, these Halloween Pumpkin Patch Brownies are just the thing!
Key Ingredients & Substitutions
Butter: Melted unsalted butter gives the brownies a rich and moist texture. If you prefer, you can swap it with coconut oil or a neutral vegetable oil for a dairy-free option.
Sugar: Granulated sugar is used for sweetness and helps create a fudgy texture. Brown sugar can be substituted for a deeper, caramel-like flavor.
Cocoa Powder: Unsweetened cocoa powder is key for that deep chocolate taste. Dutch-processed cocoa can be used for a milder, less acidic flavor.
Shredded Coconut: This adds a unique texture and mimics the look of soil in the pumpkin patch. You can skip it or replace with finely chopped nuts if preferred.
Colored Frosting: The fun pumpkin decorations are made from colored frostings. Store-bought is fine, but homemade gives you more control over sweetness and colors. Gel food coloring keeps frosting smooth and vibrant.
How Do You Make Perfect Pumpkin Decorations on Brownies?
Decorating these brownies with pumpkin shapes is a creative step that really makes them stand out. Here’s how to get it just right:
- Use a piping bag with a star or round tip for the pumpkin body (orange frosting). Squeeze gently and shape a small round pumpkin on each brownie square.
- Add green frosting for leaves and grass at the base of the pumpkin using a small leaf tip or a toothpick.
- For the pumpkin stem, pipe a small line or curved shape in black frosting.
- White frosting pumpkins add variety and spooky fun; use the same technique but with white frosting and black accents.
- Keep the frosting at room temperature so it’s easy to pipe and holds shape without melting or spreading.
Take your time and practice on a plate before decorating the brownies. These little details bring the pumpkin patch to life and make the brownies great for party displays or gifts!
Equipment You’ll Need
- 9×13-inch baking pan – perfect size for even baking and easy cutting into squares.
- Parchment paper – helps you lift the brownies out of the pan without sticking.
- Mixing bowls – large for batter, small for topping mix, to keep things organized.
- Sifter – makes sure your cocoa powder and flour mix smoothly with no lumps.
- Piping bags and tips – essential for creating the pumpkin shapes and leaf details with frosting.
- Wire rack – lets the brownies cool evenly and prevents sogginess.
Flavor Variations & Add-Ins
- Swap shredded coconut with chopped nuts like pecans or walnuts for extra crunch and fall flavor.
- Add a teaspoon of cinnamon or pumpkin pie spice into the batter for a warm pumpkin-season twist.
- Top with mini chocolate chips or white chocolate chips mixed into the batter for bite-sized bursts of sweetness.
- Use cream cheese frosting instead of buttercream for a tangy, rich contrast to the chocolate brownies.
How to Make Halloween Pumpkin Patch Brownies
Ingredients You’ll Need:
For the Brownies:
- 1 cup (226g) unsalted butter, melted
- 2 cups (400g) granulated sugar
- 4 large eggs
- 1 teaspoon vanilla extract
- 1 cup (125g) all-purpose flour
- ¾ cup (75g) unsweetened cocoa powder
- ½ teaspoon baking powder
- ½ teaspoon salt
For the Topping:
- 1 cup (90g) shredded coconut
- 2 tablespoons unsweetened cocoa powder
- 2 tablespoons granulated sugar
For Decoration:
- Orange, white, green, and black colored frosting (store-bought or homemade)
- Optional: small candy decorations or colored sprinkles for “grass”
How Much Time Will You Need?
This recipe takes about 15 minutes for preparation, 30-35 minutes for baking, and cooling time of around 30 minutes before decorating. Altogether, plan for about 1.5 hours from start to finish to create these festive Halloween brownies.
Step-by-Step Instructions:
1. Prepare the Brownie Batter:
Preheat your oven to 350°F (175°C) and line a 9×13-inch baking pan with parchment paper, leaving some overhang. In a large mixing bowl, stir together the melted butter and sugar until smooth. Add the eggs one at a time, mixing well after each. Stir in the vanilla extract.
Sift the flour, cocoa powder, baking powder, and salt into the wet ingredients. Gently fold the dry ingredients in until just combined and smooth.
2. Add the Coconut Topping:
Pour the brownie batter evenly into the prepared pan. In a small bowl, mix the shredded coconut with cocoa powder and sugar. Sprinkle this mixture evenly over the brownie batter, creating a “soil-like” topping for your pumpkin patch.
3. Bake and Cool:
Bake the brownies for 30 to 35 minutes, or until a toothpick inserted near the center comes out with moist crumbs. Remove from oven and let cool completely in the pan on a wire rack.
4. Decorate Your Pumpkin Patch:
Once cooled, cut the brownies into about 12 squares. Use piping bags filled with colored frostings to create little pumpkin shapes on each piece: orange for the pumpkin body, green for leaves and grass at the base, black for the stem, and white for extra pumpkins or spooky accents. Add candy eyes or sprinkles for additional fun if you like.
5. Serve and Enjoy:
Your Halloween Pumpkin Patch Brownies are ready to be enjoyed! Share this festive, rich, and fudgy treat with friends and family, perfect for a Halloween party or cozy fall gathering.
Can I Use a Boxed Brownie Mix Instead of Making Brownies from Scratch?
Yes, you can! Simply prepare the boxed brownie mix according to the package instructions and follow the recipe from step 6 to add the coconut topping and decorations. Just make sure the brownies have fully cooled before decorating.
How Should I Store Leftover Halloween Pumpkin Patch Brownies?
Store leftovers in an airtight container at room temperature for up to 3 days. For longer storage, keep them in the fridge for up to a week or freeze for up to 3 months. Thaw frozen brownies in the fridge overnight and decorate before serving if needed.
Can I Substitute Shredded Coconut in the Topping?
If you’re not a fan of coconut or have allergies, try chopped nuts like walnuts or pecans for a crunchy texture, or even more chocolate chips. These will still create a fun “soil” effect for your pumpkin patch brownies.
What’s the Best Way to Pipe the Pumpkin Decorations?
Use piping bags fitted with a star tip for the pumpkin bodies and a leaf tip for the leaves. If you don’t have piping bags, a zip-top bag with a tiny corner snipped off works well too. Keep frosting at room temperature for smooth piping and practice on a plate before decorating the brownies.