Halloween Graveyard Dirt Cups
Halloween Graveyard Dirt Cups are a fun and spooky treat that's perfect for celebrating the season. They usually have layers of chocolate pudding, crushed cookies that look like dirt, and…
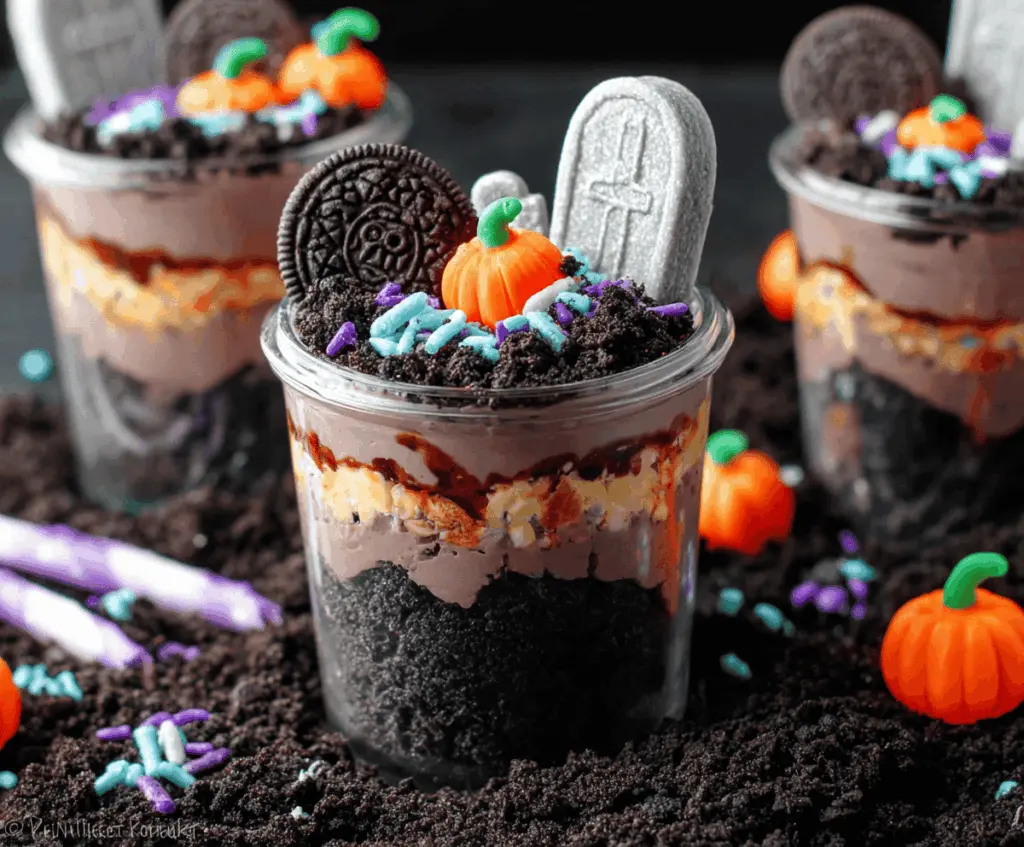
Tip: save now, cook later.Halloween Graveyard Dirt Cups are a fun and spooky treat that’s perfect for celebrating the season. They usually have layers of chocolate pudding, crushed cookies that look like dirt, and gummy worms or candy tombstones on top. The mix of creamy pudding with crunchy cookie crumbs gives you a delicious texture that everyone loves.
I always enjoy making these because they’re simple to put together, and they bring out the kid in me. I like to get creative with the toppings—sometimes adding mini marshmallows as little ghosts or using candy eyes to make the worms extra creepy. It’s a fun way to get the whole family involved in the kitchen, especially during Halloween parties or gatherings.
Whenever I serve these dirt cups, they disappear fast! They’re a great way to end a Halloween meal or just a sweet snack while watching a scary movie. If you’re looking for a festive and easy dessert that brings smiles (and maybe a few playful shrieks), these Dirt Cups are a great choice.
Key Ingredients & Substitutions
Oreos: Crushed Oreos create the “dirt” texture and rich chocolate flavor. If you want gluten-free, try chocolate sandwich cookies labeled gluten-free or crushed chocolate graham crackers.
Chocolate Pudding: You can use instant mix or homemade pudding; both work well. For a dairy-free option, use coconut or almond milk pudding mixes.
Cream Cheese Whipped Topping: Cream cheese brings a smooth tang that balances the sweetness. If you want a lighter version, you can swap half the cream cheese for whipped topping, but keep the cream cheese to maintain the flavor.
Butterfinger Candy: Adds a nice crunch and buttery taste. For nut allergies, replace with crushed toffee bits or chocolate chips.
Decorations: Have fun with Halloween candies! Pumpkins, candy tombstones, and colored sprinkles make it festive. Use gummy worms or candy eyeballs for different spooky looks.
How Do You Get the Dirt Cups Layered Neatly and Look Fun?
Layering the cups is key to making these dirt cups look great and taste balanced. Here are some tips:
- Use clear cups: This shows off each layer beautifully.
- Press cookie crumbs gently: Press the bottom cookie layer lightly to create a firm base.
- Drizzle syrup carefully: Add chocolate syrup around the sides to get a streaky effect. Use a spoon or squeeze bottle slowly.
- Use a piping bag (optional): For neat cream cheese layers, a piping bag makes it easier to add a smooth even layer.
- Set between layers: Chill in the fridge briefly between layers if needed to keep things steady.
- Have fun decorating: Stick in cookies and candies upright for the ‘graveyard’ look, and sprinkle colorful decorations last.

Equipment You’ll Need
- Food processor or plastic bag and rolling pin – to crush Oreos finely for the dirt texture.
- Mixing bowls – you’ll need one for the cream cheese topping and another for whipping cream.
- Electric mixer or whisk – makes beating cream cheese and whipping cream easier and smooth.
- Clear plastic cups – perfect for layering and showing off your spooky dirt cups.
- Spoon or piping bag – for layering pudding and cream cheese mixture neatly.
Flavor Variations & Add-Ins
- Swap chocolate pudding with vanilla or butterscotch pudding for a different taste and look.
- Add crushed peppermint candies or Andes mints for a cool, minty twist that pairs great with chocolate.
- Use crushed peanut butter cups or Reese’s instead of Butterfinger for a rich peanut butter flavor.
- Top with gummy worms or candy eyeballs for extra creepy fun, great for kids’ parties.
Equipment You’ll Need
- Food processor or plastic bag and rolling pin – to crush Oreos finely for the dirt texture.
- Mixing bowls – one for the cream cheese mixture, one for whipping cream.
- Electric mixer or whisk – to beat the cream cheese mixture and whip the cream.
- Clear plastic or glass cups – perfect for showing off layered dirt cups.
- Spoons and optional piping bags – for layering and decorating neatly.
Flavor Variations & Add-Ins
- Swap chocolate pudding for vanilla or butterscotch pudding for a sweeter twist.
- Add crushed peppermint candies or Andes mints for a refreshing minty flavor.
- Use crushed peanut butter cups or Reese’s instead of Butterfinger for a peanut butter note.
- Top with gummy worms, candy eyeballs, or sour belts for extra spooky fun.
- Try layering in some chopped nuts or toffee bits for added crunch.
Can I Use Store-Bought Pudding Instead of Homemade?
Yes! Store-bought instant chocolate pudding works perfectly and saves time. Just prepare it according to package instructions and chill before layering.
How Long Can I Store the Dirt Cups?
These cups keep well in the fridge for up to 3 days. Cover them tightly with plastic wrap or lids to prevent drying out or absorbing fridge odors.
Can I Make These Ahead of Time?
Absolutely! Prepare and assemble the cups up to a day in advance. Just store them covered in the fridge and add the decorations right before serving for the freshest look.
What If I Don’t Have a Food Processor to Crush Oreos?
No worries! Put the Oreos in a sealed plastic bag and crush them with a rolling pin, heavy pan, or even your hands until you have fine crumbs that resemble dirt.