Burnt Honey Medovik
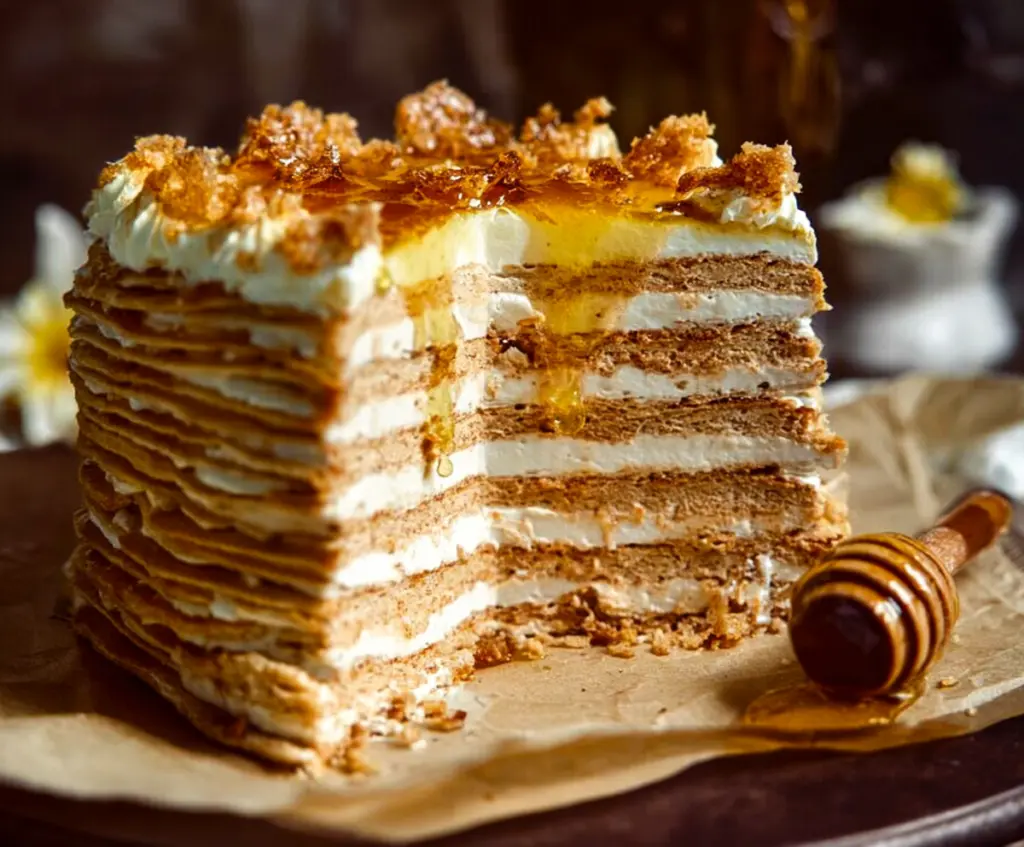
Burnt Honey Medovik is a beautiful Russian layer cake that's all about soft, honey-infused cake layers paired with creamy filling. The “burnt honey” part gives it a deep, caramel-like flavor…
Tip: save now, cook later.Burnt Honey Medovik is a beautiful Russian layer cake that’s all about soft, honey-infused cake layers paired with creamy filling. The “burnt honey” part gives it a deep, caramel-like flavor that’s just a little smoky and sweet, making every bite uniquely delicious. It’s the kind of cake that feels both fancy and homemade at the same time.
I love how the cake layers are thin and tender, so when you stack them up with the smooth cream, it all melts in your mouth. The burnt honey gives it that warm, rich taste that keeps everyone reaching for seconds. I find that the longer you let it rest in the fridge, the better the flavors come together, so it’s great to make ahead of time for a special occasion or just a treat.
My favorite way to enjoy Burnt Honey Medovik is with a hot cup of tea on a quiet afternoon. It’s such a lovely, comforting cake that feels like a little celebration in every slice. Plus, it’s always a conversation starter when friends ask, “What’s in this?!” and I get to share the story of the burnt honey magic.
Key Ingredients & Substitutions
Honey: The star of this cake, burnt honey gives it that deep caramel flavor. Use a good-quality honey for best results. If you don’t have honey, maple syrup can work, but the flavor will be different.
Sour Cream: Sour cream makes the filling tangy and smooth. For a lighter option, try mixing Greek yogurt with heavy cream. Avoid fat-free sour cream—it can be too watery.
Flour: All-purpose flour is perfect here. If you need a gluten-free version, try a blend designed for baking, but your layers might be more delicate.
How Do You Perfectly Burn Honey Without Bitterness?
The burnt honey flavor is amazing but tricky. Here’s how to get it right:
- Use a heavy-bottomed pan to ensure even heat without hotspots.
- Keep stirring constantly to prevent burning in one spot.
- Watch the color closely; stop heating when it reaches rich amber, not dark brown.
- Remove from heat immediately to avoid bitterness.
- Let cool slightly before adding eggs to prevent scrambling.
This slow, careful step shapes the cake’s unique flavor, so patience pays off!
Equipment You’ll Need
- Heavy-bottomed saucepan – great for melting honey and sugar evenly without burning too fast.
- Mixing bowls – you’ll need a few to combine dough and cream separately with ease.
- Whisk – perfect for blending eggs into the hot honey mixture and keeping the cream smooth.
- Rolling pin – helps roll out thin, even cake layers for stacking.
- Baking sheets lined with parchment paper – prevents sticking and helps bake thin layers evenly.
- Plastic wrap – for chilling dough portions to make them easier to roll out.
- Sharp knife or cake slicer – for trimming layers neatly and slicing the finished cake cleanly.
Flavor Variations & Add-Ins
- Add a pinch of cinnamon or ground cardamom in the dough for a warm spice note that complements honey well.
- Mix chopped toasted nuts like walnuts or hazelnuts into the cream for extra crunch and nutty flavor.
- Swap half the sour cream with Greek yogurt for a tangier filling that cuts through the sweetness.
- Drizzle melted dark chocolate over the top for a bittersweet contrast to the rich honey and cream layers.

Burnt Honey Medovik
Ingredients You’ll Need:
For the Burnt Honey Cake Layers:
- 1 cup honey
- 1 cup granulated sugar
- 1/2 cup unsalted butter
- 3 large eggs
- 3 cups all-purpose flour
- 1 1/2 tsp baking soda
For the Cream Filling:
- 4 cups sour cream (preferably thick, like crème fraîche) or a mix of sour cream and heavy cream
- 1 1/4 cups powdered sugar (adjust to taste)
- 1 tsp vanilla extract
For Garnish:
- Crumbled cake scraps (from trimming layers)
- Honey for drizzling
How Much Time Will You Need?
This cake takes about 45 minutes to prepare and bake the layers, plus at least 8 hours or overnight chilling time so the flavors meld and the layers soften nicely. Plan ahead to enjoy the best texture and taste!
Step-by-Step Instructions:
1. Make the Burnt Honey Mixture:
In a heavy-bottomed saucepan over medium heat, combine honey, sugar, and butter. Stir constantly until the sugar dissolves and the mixture turns a rich amber color—watch carefully to avoid burning. Remove from heat and let it cool slightly.
2. Add Eggs and Baking Soda:
Temper the eggs by slowly whisking a small amount of the warm honey mixture into beaten eggs. Then gradually stir this egg mixture back into the saucepan. Add baking soda; the mixture will foam and lighten in color.
3. Incorporate the Flour:
Gradually add the flour, stirring continuously until a soft, slightly sticky dough forms.
4. Divide and Chill Dough:
Divide dough into 8 to 10 equal portions for thin layers. Wrap each in plastic and refrigerate for at least 30 minutes to firm up.
5. Roll Out and Bake Layers:
Preheat oven to 350°F (175°C). Roll each dough portion as thinly and evenly as possible on a floured surface (about 8-inch circles or squares). Transfer to parchment-lined baking sheets. Bake 4–6 minutes until golden and slightly firm. Let cool and trim edges evenly; save scraps for garnish.
6. Prepare the Cream Filling:
Whisk together sour cream, powdered sugar, and vanilla until smooth and slightly thickened.
7. Assemble the Cake:
Place a cake layer on a serving plate. Spread cream filling generously on top. Repeat layers, finishing with a cream layer on top.
8. Garnish:
Sprinkle crumbled cake scraps over the top for texture. Drizzle honey decoratively to add shine and sweet flavor.
9. Chill and Set:
Cover and refrigerate cake at least 8 hours or overnight to soften layers and blend flavors.
10. Serve:
Slice carefully with a sharp knife and enjoy with your favorite tea or coffee.
Can I Use Frozen Dough for the Cake Layers?
Yes! You can prepare the dough portions in advance and freeze them wrapped tightly in plastic. When ready to bake, thaw in the fridge overnight and roll out as usual.
How Long Can I Store Leftover Burnt Honey Medovik?
Store the cake covered in the refrigerator for up to 3 days. The flavors improve with time, but it’s best enjoyed within a few days for optimal texture.
Can I Substitute the Sour Cream in the Filling?
Absolutely! You can use a blend of sour cream and heavy cream or replace some or all sour cream with Greek yogurt for a tangier flavor. Avoid low-fat versions, as they may affect the creaminess.
What’s the Best Way to Serve This Cake?
Burnt Honey Medovik is delicious served chilled with a cup of tea or coffee. For special occasions, add a drizzle of warm honey or a sprinkle of toasted nuts on top for extra flair.
