
Baked Salmon Sushi
Baked Salmon Sushi is a fresh twist on the classic favorite, combining tender, flaky salmon with the satisfying bite of sushi rice. The salmon is lightly baked to bring out…
Tip: save now, cook later.Baked Salmon Sushi is a fresh twist on the classic favorite, combining tender, flaky salmon with the satisfying bite of sushi rice. The salmon is lightly baked to bring out a rich flavor while keeping it soft enough to blend beautifully with the other sushi ingredients. You get the best of both worlds—the comforting warmth of cooked fish along with the classic sushi textures.
I love making this when I want something a little different but still familiar. It’s a great way to enjoy salmon in a more casual, easy-to-handle form since baking it takes away any worry about raw fish. Plus, the flakes of salmon mix perfectly with the sticky rice, and when you add a touch of soy sauce or a bit of wasabi, it just feels so satisfying to eat.
My favorite way to serve Baked Salmon Sushi is with a simple side of pickled ginger and some crunchy cucumber slices. It’s a great choice for anything from a casual lunch to a fun dinner with friends. Trying this dish will probably make you want to keep it in your regular meal rotation like I do—it’s just that enjoyable and simple to put together.
Key Ingredients & Substitutions
Sushi Rice: This sticky rice is essential for the sushi’s texture. If you can’t find sushi rice, use short-grain rice instead. Rinse well for the best stickiness.
Salmon: Use fresh, sushi-grade salmon for safety and flavor. If unavailable, opt for wild-caught or farmed salmon fillets. Frozen salmon works too, just thaw properly.
Rice Vinegar: Adds a mild tang and sweet balance to the rice. You can substitute with apple cider vinegar but reduce the amount slightly as it’s stronger.
Panko Breadcrumbs: These give a nice crunch on top. If you want gluten-free, use crushed rice crackers or gluten-free breadcrumbs instead.
Tobiko or Masago: These tiny fish eggs add a pop of color and mild briny flavor; skip them if you prefer or replace with finely chopped red bell pepper for crunch and color.
How Do You Get Perfect Sticky Sushi Rice?
Sticky rice is the heart of any sushi dish. Here’s how to get it just right:
- Rinse Well: Wash the rice until water runs clear to remove excess starch but keep enough for stickiness.
- Proper Cooking: Use the right rice-to-water ratio (about 1:1.25) and let the rice steam after cooking for 10 minutes to finish softening.
- Season Evenly: Mix the vinegar-sugar-salt blend gently into the rice while still warm, using a slicing motion to avoid smashing grains.
- Cover While Cooling: Use a damp cloth to keep the rice moist and prevent drying out as it cools.
Treating sushi rice with care makes a huge difference in texture and the overall sushi experience!
Equipment You’ll Need
- Rice cooker – makes perfect, evenly cooked sushi rice every time without fuss.
- Sushi mold or rimmed baking dish – helps shape your sushi block easily and neatly.
- Sharp knife – for clean, precise slices that won’t squish the sushi.
- Small brush – great for spreading mayonnaise evenly on top before baking.
- Mixing bowl – use it to season and cool the rice without smashing the grains.
Flavor Variations & Add-Ins
- Swap salmon for cooked shrimp or crab for a different seafood flavor that still pairs well with sushi rice.
- Add avocado slices inside or on top for creaminess and extra healthy fats.
- Mix spicy mayo into the salmon layer for a mild kick and rich flavor.
- Top with thin cucumber strips or pickled radish for some fresh crunch and brightness.
How to Make Baked Salmon Sushi?
Ingredients You’ll Need:
Main Ingredients:
- 2 cups sushi rice
- 2 1/2 cups water
- 1/4 cup rice vinegar
- 3 tablespoons sugar
- 1 teaspoon salt
- 12 oz fresh salmon fillet, skin removed
- 2 tablespoons soy sauce
- 1 tablespoon mayonnaise (optional, for brushing)
Toppings and Garnishes:
- 1 tablespoon toasted sesame seeds (mixed black and white)
- 2 tablespoons crispy panko breadcrumbs (toasted)
- 1 tablespoon chopped chives or green onion
- 1 tablespoon tobiko (flying fish roe) or masago (optional)
- Thinly sliced cucumber or avocado for garnish (optional)
- Pickled ginger, for serving
- Wasabi, for serving
- Lime wedges, for serving
How Much Time Will You Need?
The whole process takes about 1 hour, including 30 minutes to prepare and cook the sushi rice, 10 minutes to prepare the salmon and assemble your sushi, and about 10 minutes to bake. Plan for a few extra minutes to cool slightly before serving.
Step-by-Step Instructions:
1. Cook the Sushi Rice:
Rinse the sushi rice under cold water until the water runs clear, then drain well. Combine rice and water in a rice cooker or pot. Cook according to your rice cooker’s instructions, or bring to a boil, then reduce heat to low, cover, and simmer for 15 minutes. Remove from heat and let it rest covered for 10 minutes.
2. Season the Rice:
In a small saucepan, gently heat rice vinegar, sugar, and salt until dissolved. Let cool. Transfer the cooked rice to a large bowl and gently fold in the vinegar mixture with a wooden spatula. Cover with a damp cloth and let the rice cool to room temperature.
3. Prepare the Salmon and Assemble Sushi:
Preheat your oven’s broiler or set it to 375°F (190°C). Slice the salmon into thin slices. Line a square or rectangular sushi mold or rimmed baking dish with plastic wrap. Press half of the sushi rice firmly into the mold’s bottom in an even layer. Arrange the salmon slices evenly over the rice. Press the remaining rice evenly over the salmon, gently pressing to compact.
4. Add Toppings and Bake:
Optionally, brush the top lightly with mayonnaise for extra browning and flavor. Sprinkle toasted panko breadcrumbs evenly over the top. Bake or broil until the breadcrumbs turn golden and the salmon is just cooked through—about 5-7 minutes under the broiler or 10-12 minutes at 375°F.
5. Finish and Serve:
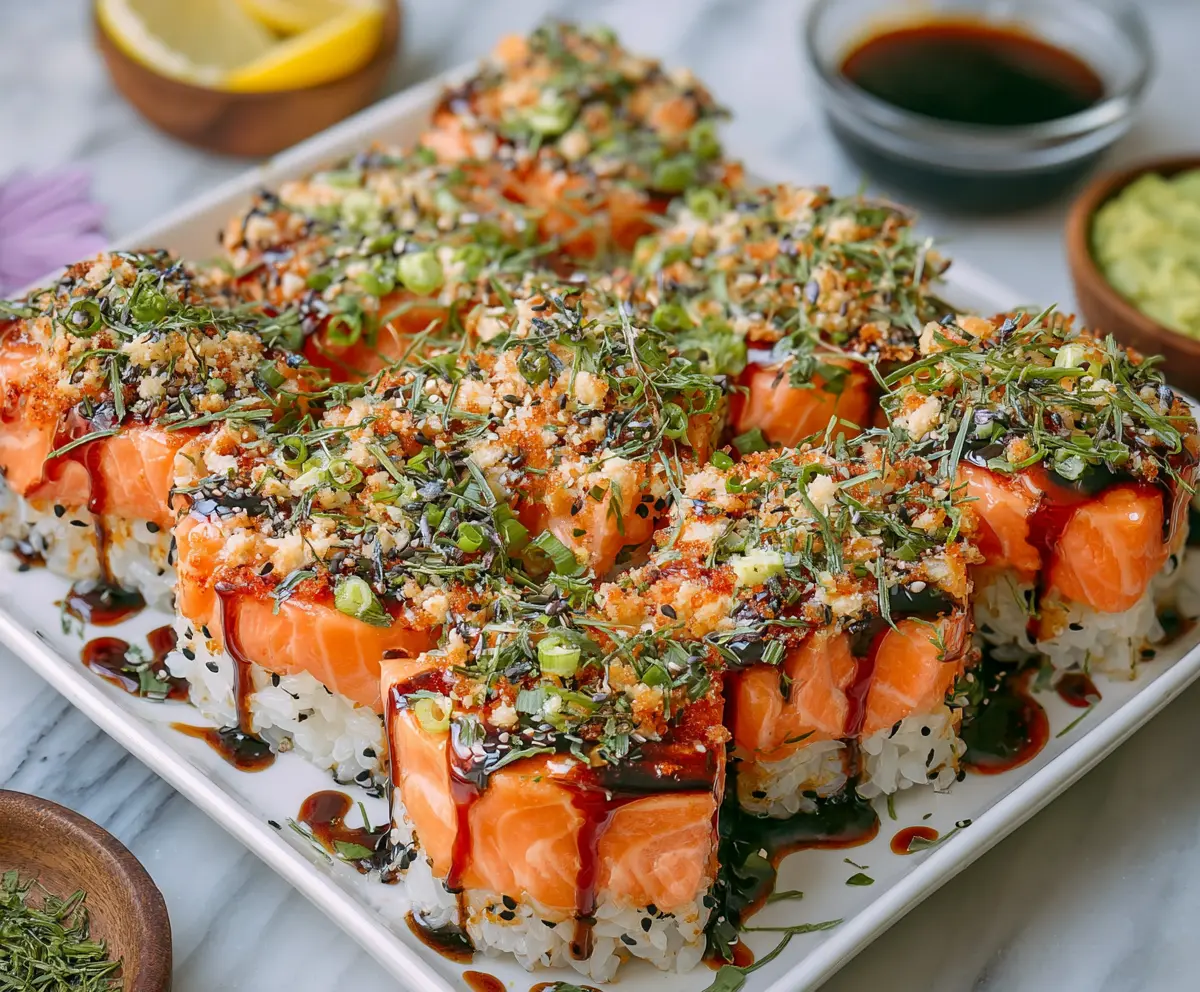
Remove from the oven and let cool slightly. Carefully invert the mold onto a serving plate so the salmon layer is on top. Sprinkle toasted sesame seeds, chopped chives or green onion, and tobiko evenly over the top. Slice into bite-sized squares. Serve with soy sauce, pickled ginger, wasabi, and lime wedges.
Enjoy your delicious, colorful Baked Salmon Sushi!
Can I Use Frozen Salmon for Baked Salmon Sushi?
Yes! Just make sure to fully thaw the salmon in the fridge overnight. Pat it dry with paper towels before slicing to remove excess moisture for the best texture.
How Should I Store Leftovers?
Store leftover baked salmon sushi in an airtight container in the fridge for up to 2 days. To keep the rice from drying out, cover it tightly. Reheat gently in the oven or enjoy chilled.
Can I Make This Recipe Without a Sushi Mold?
Absolutely! Use a rimmed baking dish or a loaf pan lined with plastic wrap. Press the layers in firmly for neat shaping, then invert onto a plate as described.
What Can I Substitute for Tobiko or Masago?
If you don’t have tobiko or masago, you can skip it or substitute with finely chopped red bell pepper or pomegranate seeds for a pop of color and crunch.
