Apple Hand Pies
Apple Hand Pies are a little bite of autumn wrapped in flaky, buttery crust. Inside, you'll find warm cinnamon-spiced apple filling that's soft and just sweet enough to make your…
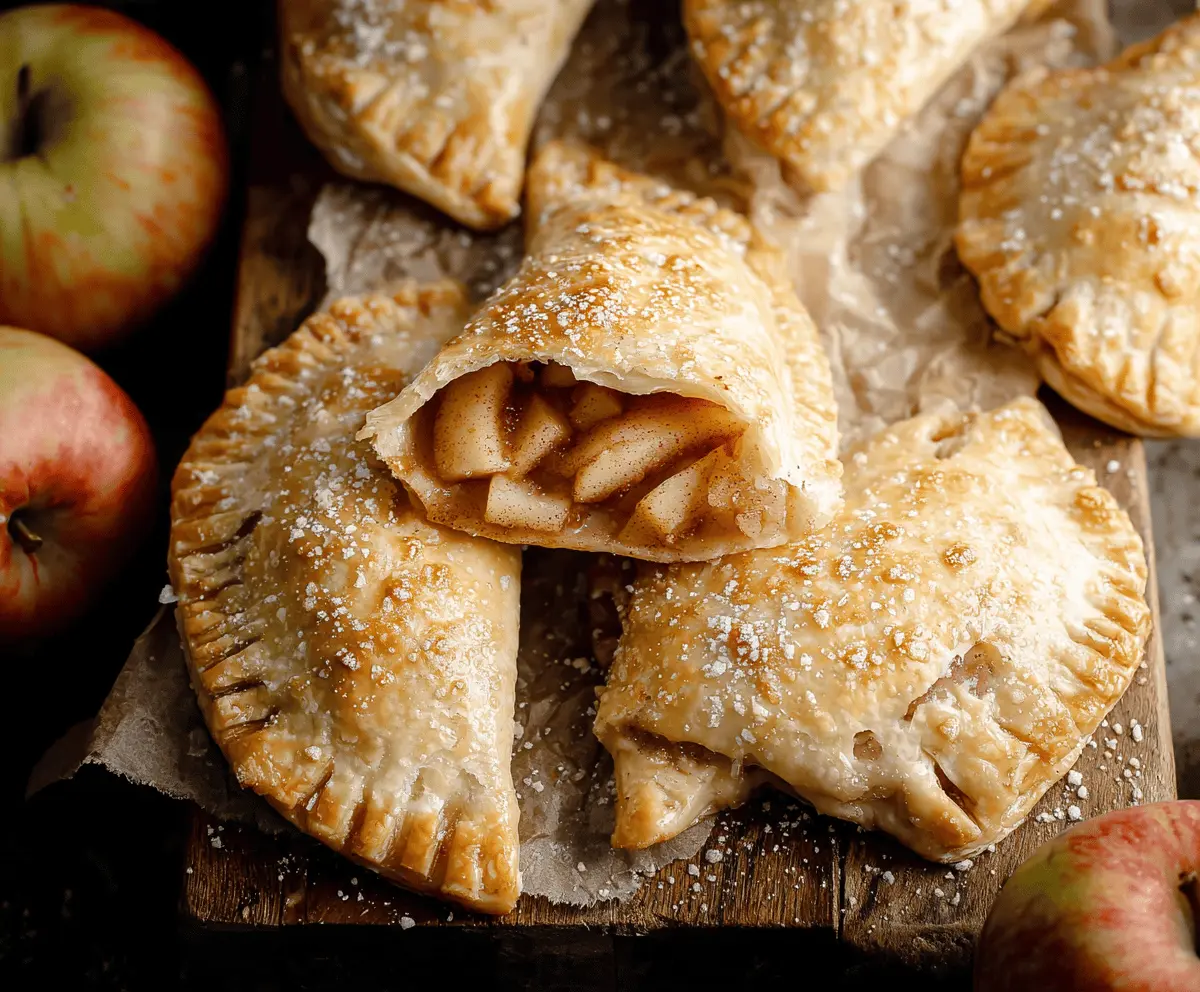
Tip: save now, cook later.Apple Hand Pies are a little bite of autumn wrapped in flaky, buttery crust. Inside, you’ll find warm cinnamon-spiced apple filling that’s soft and just sweet enough to make your taste buds happy. These hand pies are perfect for when you want a cozy treat that’s easy to hold and share.
I love making these because they feel like a special treat but are surprisingly simple to put together. I usually make a big batch and freeze some for later, so I always have a homemade dessert ready to pop in the oven. One tip I’ve learned is to brush a little egg wash on top before baking to get that perfect golden color and a bit of shine.
The best way to enjoy these Apple Hand Pies is straight from the oven, maybe with a splash of vanilla ice cream or a cup of tea. They bring back memories of chilly afternoons baking with family, and every bite feels like a warm hug. I’m sure once you try them, they’ll become a favorite in your home too.

Key Ingredients & Substitutions
Apples: Using tart apples like Granny Smith gives a nice balance to the sweet filling and helps it hold shape. If you like sweeter pies, go for Fuji or Honeycrisp. Avoid very soft apples as they get mushy.
Pie Crust: Refrigerated pie crust is a great shortcut, but homemade dough adds a personal touch and flakiness. For a gluten-free option, use gluten-free pie crust or puff pastry.
Spices: Cinnamon is the star spice here, giving warmth to the filling. Nutmeg adds depth but is optional. You can also add a pinch of ground cloves or ginger for extra aroma.
Lemon Juice: A little lemon juice keeps the apples from browning and brightens the flavor. Fresh is best, but bottled works too.
Egg Wash: Brushing the tops with beaten egg makes the crust golden and shiny. For an egg-free option, use milk or melted butter.
How Can You Keep the Filling from Making the Crust Soggy?
To avoid soggy crusts in your hand pies, it’s important to manage the moisture of the apple filling carefully. Here’s how:
- Coat the filling: Toss diced apples with a bit of flour before filling. The flour helps thicken the juices as it bakes.
- Drain excess liquid: If your apples release a lot of juice, consider draining some off before filling the crust.
- Don’t overfill: Use about 2 tablespoons of filling per pie. Too much filling may spill out and make the crust soggy.
- Seal well: Press edges firmly with a fork to prevent leaks during baking.
- Vent the crust: Cut small slits on top to let steam escape, which reduces sogginess.
Following these tips keeps your hand pies deliciously flaky and perfectly cooked every time!
Equipment You’ll Need
- Rolling pin – helps you roll out the pie crust evenly without tearing.
- Round cookie cutter or a small bowl – to cut perfect circles for your pies.
- Baking sheet – holds the hand pies and ensures even baking.
- Parchment paper – stops the pies from sticking and makes clean-up easy.
- Fork – handy for sealing the edges of the pies neatly.
- Pastry brush – great for brushing on the egg wash for a shiny, golden crust.
Flavor Variations & Add-Ins
- Add chopped nuts like walnuts or pecans for extra crunch and flavor depth.
- Mix in dried cranberries or raisins for a sweet contrast to the tart apples.
- Swap cinnamon for pumpkin pie spice when you want a fall-inspired twist.
- Try adding a small spoonful of caramel sauce inside for a gooey surprise.
How to Make Apple Hand Pies
Ingredients You’ll Need:
- 2 cups peeled, cored, and diced apples (about 2 medium apples)
- ¼ cup granulated sugar
- 1 teaspoon ground cinnamon
- ¼ teaspoon ground nutmeg (optional)
- 1 tablespoon all-purpose flour
- 1 teaspoon lemon juice
- 1 package (14 oz) refrigerated pie crusts or homemade pie dough
- 1 egg, beaten (for egg wash)
- Coarse sugar, for sprinkling (optional)
- Powdered sugar, for dusting (optional)
How Much Time Will You Need?
This recipe takes about 15 minutes to prepare, plus 20-25 minutes for baking. So, you’ll have warm, delicious hand pies ready in about 40 minutes total. Perfect for a quick dessert or snack!
Step-by-Step Instructions:
1. Prepare Your Oven and Filling:
Start by preheating your oven to 375°F (190°C). Line a baking sheet with parchment paper to keep the pies from sticking. Next, mix together diced apples, sugar, cinnamon, nutmeg (if using), flour, and lemon juice in a bowl. Stir well to coat all the apples and set this aside.
2. Cut and Fill the Dough:
Roll out your pie crust if needed on a lightly floured surface. Use a round cutter or small bowl about 4-5 inches wide to cut out circles from the dough. Spoon about 2 tablespoons of the apple filling into the center of each circle, leaving some space along the edges for sealing.
3. Seal and Bake Your Hand Pies:
Brush the edges of each dough circle lightly with water or beaten egg to help seal. Fold the dough over the filling to create a half-moon shape. Press the edges firmly with a fork to seal and prevent leaks. Place the hand pies on your prepared baking sheet. Brush the tops with beaten egg for a golden finish, and sprinkle with coarse sugar if you want a bit of crunch.
Use a small knife to cut 1 or 2 tiny slits on top of each pie to let steam escape during baking. Bake your pies for 20-25 minutes or until golden brown and bubbly. Let them cool a little, then dust with powdered sugar if you like. Serve warm, maybe with a scoop of vanilla ice cream or whipped cream for extra yum!
Can I Use Frozen Apples for the Filling?
Yes, you can use frozen apples, but make sure to thaw them thoroughly and drain any excess liquid. This helps prevent the crust from getting soggy.
Can I Make Apple Hand Pies Ahead of Time?
Absolutely! You can assemble the pies and freeze them uncooked on a baking sheet. Once frozen, transfer to a freezer bag and bake straight from frozen—just add a few extra minutes to the baking time.
What’s the Best Way to Store Leftover Hand Pies?
Store leftover pies in an airtight container at room temperature for up to 2 days, or refrigerate for up to 5 days. Reheat in a warm oven to keep the crust crispy.
Can I Substitute the Pie Crust With Puff Pastry?
Yes! Puff pastry works wonderfully and gives a light, flaky crust. Just thaw it according to package instructions and proceed with the same steps for filling and baking.